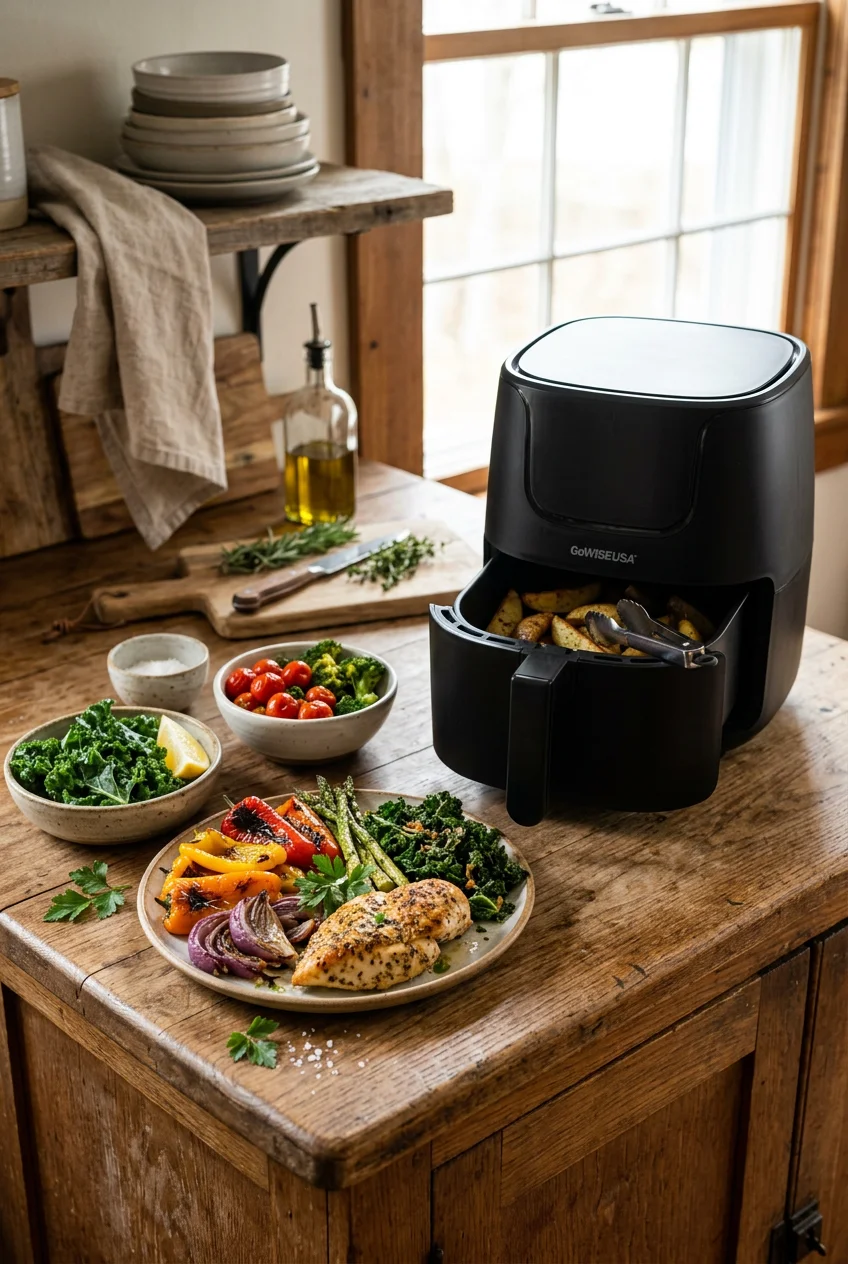
What’s Inside
- The Foundation of Air Fryer Healthy Recipes: Crispy Tofu
- Perfecting Air Fryer Healthy Recipes for Salmon
- The Science of Crispy Sweet Potato Fries
- Meal Prep Chicken Breasts Without the Dryness
- Crunchy Roasted Chickpeas for Snacking
- Uniform Veggie Roasting for Weekly Prep
- Dehydrated Apple Chips in Dual-Function Machines
- Small-Batch Granola That Doesn’t Burn
- Blistered Brussels Sprouts with Proper Oil Control
- Essential Maintenance and Accessories for Clean Cooking
Last Tuesday at Whole Foods, I watched a woman buy a $200 Ninja appliance and immediately fill her cart with frozen, processed tater tots. That totally defeats the purpose, which is exactly why I started developing actual air fryer healthy recipes. My first attempt back in 2020 was a disaster. I threw wet, unseasoned zucchini into a cold basket and ended up with a gray, soggy puddle that smelled like hot plastic. I ate it anyway. It was terrible. Since then, I’ve figured out the exact temperatures and techniques that actually work for clean eating. As a nutritionist, I need my food to taste good without relying on deep frying. I spent months ruining good produce before I understood how high-speed heat circulation interacts with food moisture. The machine isn’t magic. It requires precise oil application, strict temperature control, and proper spacing to work. Skip the fat-free stuff. It tastes like wet cardboard. Let’s walk through the specific methods I use to make real, whole foods crispy without drowning them in vegetable oil.
1. The Foundation of Air Fryer Healthy Recipes: Crispy Tofu

When I started building a repertoire of plant-based meals, tofu was my biggest hurdle. I tried making it in my Philips machine and failed miserably. Last month, I rushed my dinner prep and crammed two entire 14-ounce blocks of Nasoya Extra Firm Tofu ($3.19 at Target) into my standard basket. Big mistake. Because I ignored the rule against overcrowding, the hot air couldn’t circulate. They steamed instead of crisped, turning into spongy, waterlogged cubes that tasted like damp cardboard. For best results, you’ve got to arrange your food in a single layer. Now, I press the tofu for twenty minutes using heavy cast iron skillets over paper towels to extract the excess moisture. I cut it into uniform one-inch cubes and toss it with two tablespoons of Trader Joe’s Low Sodium Soy Sauce ($2.99 for a 15-ounce bottle) and one teaspoon of raw honey. I preheat the machine to 400°F. Preheating for three to five minutes is mandatory, especially for proteins, because starting with a cold basket leads to uneven cooking. I cook the tofu for exactly fourteen minutes, shaking the basket vigorously at the seven-minute mark. The result is a crispy exterior with a firm, chewy center. If you’ve got a lot to cook, do it in batches. The extra ten minutes saves you from eating soggy protein. Learned that the hard way.
2. Perfecting Air Fryer Healthy Recipes for Salmon

Air fryer salmon is a staple in my weekly rotation because it’s rich in Omega-3s and takes almost zero active time. But getting the texture right took some trial and error. Last Tuesday, I bought a gorgeous cut of Costco Kirkland Signature Farmed Atlantic Salmon ($12.99 per pound). I neglected to oil the basket properly, and half the fillet permanently fused to the non-stick grate. Scrubbing that off took twenty minutes and ruined my sponge. Now, I brush my six-ounce salmon fillets lightly with a high smoke point oil. I use Chosen Foods Avocado Oil Spray, which costs $6.98 for a 4.7-ounce bottle at Walmart. It has a smoke point of 520°F, so it won’t degrade or create off-flavors under high heat. I season the fish with one teaspoon of garlic powder, a half teaspoon of smoked paprika, a pinch of sea salt, and coarse black pepper. I air fry the fillets at 400°F for exactly eight minutes. Depending on the thickness of your cut, it might need up to ten. You’re looking for an internal temperature of 145°F. I use a digital meat thermometer to check the thickest part. When it’s done, the edges sizzle, the center stays vibrant pink, and the flesh flakes apart cleanly with a fork. It’s the most efficient way to prepare fish without stinking up your kitchen.
3. The Science of Crispy Sweet Potato Fries

I used to skip the soaking step when making sweet potato fries because I’m impatient. I’d chop up a potato, throw it in, and hope for the best. The fries always ended up burned on the thin ends and raw in the middle. The starch content is the culprit. For healthier fries that actually crunch, you need precision. I take a large sweet potato and slice it into uniform half-inch thick sticks. I submerge these in a bowl of ice-cold water for thirty minutes. This draws out the excess surface starch that prevents crisping. After soaking, I dry them thoroughly with paper towels. Any residual water creates steam, which kills the crunch instantly. I toss the dried sticks in a large bowl with exactly one tablespoon of Pompeian Smooth Extra Virgin Olive Oil ($8.49 for 16 ounces at Kroger). I add one teaspoon of garlic powder, one teaspoon of Simply Organic Paprika ($5.49 for 2.96 ounces at Sprouts), and a heavy pinch of salt. I set the temperature to 400°F and cook them for fifteen minutes. Don’t forget to shake the basket aggressively halfway through. If you fail to shake them, the bottom fries stay soft while the top layer scorches. When done right, they have a blistered, golden-brown exterior and a soft, fluffy interior.

Cathy Yoder’s Air Fryer Cookbook for Two (2026): Easy
A dependable everyday pick — Cathy Yoder’s Air Fryer Cookbook for Two (2026): Easy. Not flashy, just solid.
4. Meal Prep Chicken Breasts Without the Dryness

Boneless, skinless chicken breasts are notoriously difficult to cook without turning them into tough, stringy pucks. For a long time, I avoided cooking them this way. I thought the rapid hot air would just suck all the moisture out. I was wrong, but you’ve got to monitor the internal temperature. I buy the Target Good & Gather Organic Chicken Breasts, which run about $7.99 per pound. For a standard six to eight-ounce breast, the sweet spot is 360°F for fourteen minutes. You must flip the meat at the seven-minute mark to ensure even browning. I use a ThermoPro Digital Meat Thermometer ($14.99 on Amazon) to verify the internal temperature hits exactly 165°F. Pulling the chicken out even three degrees past that ruins the texture. Preheating is critical here. Always preheat your machine for three to five minutes before adding the poultry. Dropping cold chicken into a cold basket means it sits in lukewarm air while the heating element ramps up, leading to a rubbery exterior. I usually coat the breasts in one tablespoon of olive oil and a dry rub made from one teaspoon of cumin, one teaspoon of chili powder, and half a teaspoon of oregano. Let it rest on a cutting board for five minutes before slicing so the juices redistribute. The outside develops a slight crust while the inside stays juicy. You might also like: 9 High Protein Crockpot Meals for Every Budget
5. Crunchy Roasted Chickpeas for Snacking

When I need a crunchy, plant-based protein snack to replace potato chips, I turn to roasted chickpeas. They’re cheap and take almost no effort. I buy the standard Kroger Garbanzo Beans for $0.89 per 15-ounce can. The biggest mistake people make is leaving the chickpeas wet. Last year, I dumped a poorly drained can directly into the basket. The residual moisture turned into steam, and several chickpeas exploded, shooting hot bean paste into the upper heating element. It smelled like burning toast for a week. Now, I rinse the beans thoroughly in a colander and spread them out on a clean dish towel. I rub them until they’re bone dry. I pick out any loose skins that fall off, as those burn instantly. I toss the dry chickpeas with one tablespoon of avocado oil, one teaspoon of smoked paprika, and half a teaspoon of cayenne pepper. I cook them at 390°F for twelve to fifteen minutes. You’ll hear them popping and crackling as they roast. I shake the basket every four minutes to keep them moving. They emerge with a deeply toasted, earthy smell and a hollow, satisfying crunch that mimics corn nuts. No exaggeration. You might also like: 12 Healthy Snacks For Work for Every Budget
6. Uniform Veggie Roasting for Weekly Prep

Dietitians recommend using this appliance for efficient meal prepping, and I agree. Roasting a massive batch of mixed vegetables at the start of the week makes clean eating easy. But you can’t just hack vegetables into random sizes and expect them to cook evenly. I chop two cups of broccoli florets and two cups of bell peppers into uniform, bite-sized pieces. Use a sharp chef’s knife for clean cuts. Tender vegetables like these cook perfectly in twelve minutes at 375°F. Firmer vegetables like carrots or butternut squash require twenty to thirty minutes, so I never mix the two in the same batch. I toss the veggies with about one tablespoon of oil. Nutritionists advise against using unrefined oils like flaxseed or walnut oil here. They break down at high temperatures, losing their health benefits and creating bitter flavors. I also strictly avoid light aerosol sprays with propellants. Those chemical propellants degrade the non-stick coating over time. I ruined my first Philips basket that way. Instead, I use a non-aerosol oil mister filled with Mantova Air Fryer Spray ($7.99 for 8.5 ounces at Whole Foods). It provides a light, even coating without the damaging chemicals. The broccoli edges get charred, while the peppers soften and sweeten. You might also like: 8 Healthy Late Night Snacks Worth Trying

The Skinnytaste Air Fryer Cookbook: The 75 Best Healthy
A dependable everyday pick — The Skinnytaste Air Fryer Cookbook: The 75 Best Healthy Recipes for Yo pulls in 126 ratings at 4.5 stars. Not flashy, just solid.
7. Dehydrated Apple Chips in Dual-Function Machines

Many newer machines, especially the oven combos, include a dehydrator function. This feature is trending for 2026, and it’s brilliant for making preservative-free snacks. I use a Ninja Foodi 6-in-1, which I bought for $169.99 at Target. I make fruit chips constantly because store-bought versions are usually deep-fried or coated in refined sugar. I buy a bag of Honeycrisp apples ($2.99 per pound at Sprouts) and slice them paper-thin. A quick warning: use a mandoline slicer for uniform thickness, but wear a cut-resistant glove. I sliced the tip of my thumb off last Thanksgiving trying to rush through a batch. It wasn’t fun. I lay the slices in a single layer on the wire racks. I set the dehydrator function to 130°F and leave them for about three hours. Low temperatures between 120°F and 150°F are necessary to slowly draw out the moisture without cooking the fruit. The low heat concentrates the natural sugars, making the apples taste incredibly sweet without added ingredients. They shrink down and develop a leathery, chewy texture that turns brittle as they cool. It’s a fantastic way to extend the shelf life of fruit that’s about to go bad.
8. Small-Batch Granola That Doesn’t Burn

Beyond savory dishes, this appliance makes incredible homemade granola in a fraction of the time a conventional oven takes. However, the high-speed fan can be your worst enemy. The first time I tried this, I used quick oats and a sparse amount of liquid binder. The fan blew the dry oats into the heating coil, filling my kitchen with thick, gray smoke. I had to open all the windows in January. Now, I use a heavier mixture. I combine two cups of Bob’s Red Mill Old Fashioned Rolled Oats ($5.49 for 32 ounces at Whole Foods), half a cup of raw almonds, and a quarter cup of pumpkin seeds. The wet ingredients are crucial to weigh it down. I mix in three tablespoons of melted coconut oil and a quarter cup of pure maple syrup. I line the bottom of my basket with parchment paper to catch the sticky syrup. I cook the mixture at 300°F for fifteen minutes. You must pull the basket out and stir the granola every three minutes. The edges brown faster than the center. When finished, it looks soft, but as it cools on the counter, it hardens into large, crunchy clusters that smell intensely of toasted nuts and caramelized sugar.
9. Blistered Brussels Sprouts with Proper Oil Control

Brussels sprouts are the ultimate test of a roasting method. If you boil them, they smell like sulfur and taste like mush. If you air fry them correctly, they become crispy, savory flavor bombs. I buy a one-pound bag of fresh sprouts from Trader Joe’s for $2.69. I trim the woody stems and slice each sprout in half. I used to leave the loose leaves in the bowl and toss them into the basket. Don’t do this. Those single, thin leaves burn to a crisp in three minutes and leave a bitter, charred taste on everything else. I discard the loose leaves now. I toss the halved sprouts with one tablespoon of avocado oil, one teaspoon of garlic powder, and a heavy pinch of kosher salt. I place them in the basket, making sure most are cut-side down. I roast them at 375°F for fifteen minutes. The cut sides caramelize against the hot metal grate, turning a deep, rich brown. The dense centers steam slightly, becoming tender but retaining a slight bite. I finish them with a drizzle of balsamic glaze right after they come out. The acidity cuts through the rich, roasted flavor perfectly. It’s the only way I’ll eat them now.

Super Easy Air Fryer Cookbook for Beginners: Quick, Simple
Honestly, Super Easy Air Fryer Cookbook for Beginners: Quick surprised me — sturdier than it looks in the photos.
10. Essential Maintenance and Accessories for Clean Cooking

Expert opinion highlights that failing to clean your machine after each use is a massive mistake. I ignored this rule for months. I’d leave bacon grease or salmon fat in the bottom drawer, thinking I’d clean it later. The next time I turned it on, the splattered fats would burn, sending acrid white smoke pouring out of the vents and making my vegetables taste like old fish. Regularly wiping down components, including the upper heating unit, prevents this buildup and ensures consistent heat. To make cleanup easier, I rely on specialized accessories. I use Reynolds Parchment Paper Liners, which cost $5.99 for a 50-count pack at Target. They have pre-punched holes that allow air to circulate while catching sticky marinades. I also use multi-layer racks to maximize my cooking space. I bought a set of Lakeland air fryer stackable racks for about $9.50 online. These racks allow me to cook chicken on the bottom tier while roasting vegetables on the top tier simultaneously. It cuts my meal prep time in half. If you’re serious about clean eating, investing in a few cheap accessories and maintaining a spotless heating element will drastically improve the taste of your food. Trust me on this.
I spent a long time thinking this appliance was just a gimmick for reheating frozen mozzarella sticks. I’m glad I was wrong. By controlling your oil usage, mastering your cooking temperatures, and avoiding the lazy mistakes I made early on, you can produce genuinely nutritious meals that don’t taste like diet food. Use real ingredients, season them heavily, and let the high-heat circulation do the heavy lifting. I hope these methods help you streamline your weekly meal prep. Pin this guide so you have the exact temperatures and times handy the next time you’re staring at a raw block of tofu wondering what to do with it.
Frequently Asked Questions
Can I use aerosol cooking spray in my air fryer?
No. Nutritionists recommend avoiding aerosol sprays because the chemical propellants can degrade the non-stick coating on your basket over time. Use a non-aerosol pump bottle filled with a high smoke point oil like avocado oil instead.
Why do my sweet potato fries turn out soggy?
Soggy fries happen when you skip soaking the potatoes or overcrowd the basket. Soak cut sweet potatoes in cold water for 30 minutes to remove excess starch, dry them completely, and cook them in a single layer.
Do I really need to preheat my air fryer?
Yes. Preheating for three to five minutes ensures the rapid hot air circulation starts immediately when you add your food. This is crucial for getting a crispy exterior on proteins and avoiding uneven cooking.
What is the best temperature for air fryer chicken breasts?
Cook boneless, skinless chicken breasts at 360°F for 13-15 minutes, flipping halfway through. Always use a digital meat thermometer to ensure the internal temperature reaches exactly 165°F to prevent the meat from drying out.
