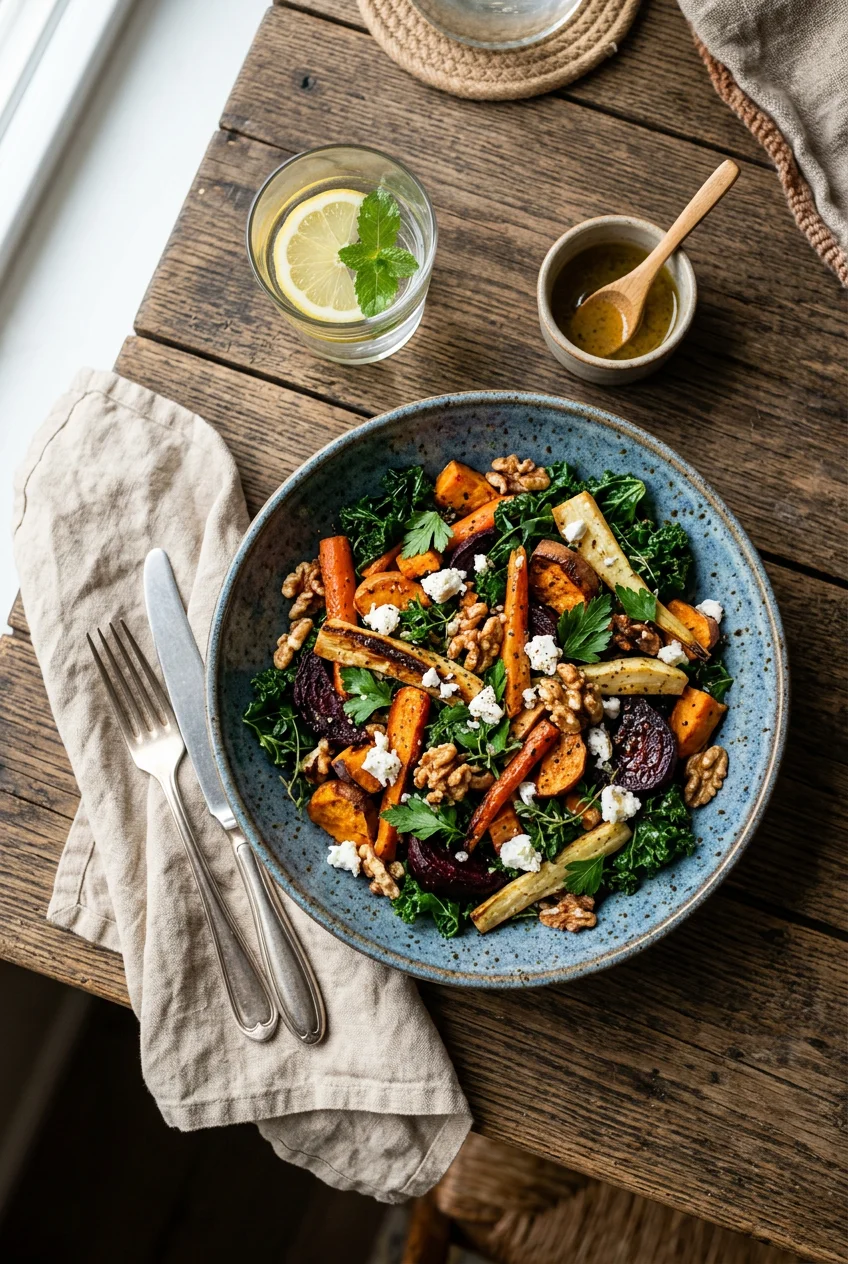
What’s Inside
- Why I Stopped Eating Cold Salads in January
- The Farro and Roasted Butternut Base
- Wilted Kale with Sous Vide Chicken
- The Air Fryer Brussels Sprout Bowl
- Crispy Chickpea and Sweet Potato Mash-Up
- Warm Lentil and Perdue Chicken Skillet
- The Fermented Gut-Health Grain Bowl
- The Cranberry Surprise Quinoa Salad
- Final Thoughts on Mastering Warm Bowls
Last February, I sat at my kitchen table shivering in a thick sweater, staring at a bowl of ice-cold iceberg lettuce and fridge-chilled tomatoes. My teeth chattered after the first bite. That was the exact moment I realized forcing down raw, cold vegetables in the dead of winter is completely unnecessary. I dumped the entire bowl into the compost bin. I started developing warm salad recipes instead. These warm salad recipes fix the problem of winter vegetable fatigue while keeping the nutrient density high. When it’s thirty degrees outside, your body craves warmth and substance, not crisp water disguised as a meal. I spent months testing different grain-to-vegetable ratios to figure out what actually digests well and keeps me full. Most people think a salad must be raw to be healthy. That’s factually incorrect. In fact, applying gentle heat to certain vegetables makes their nutrients easier for your body to absorb. I’m going to walk you through exactly how I build these meals. We’re covering the specific grains, proteins, and techniques that prevent the dreaded soggy vegetable syndrome.
Why I Stopped Eating Cold Salads in January

Warm cooked salads are gentler on the digestive system and activate digestive enzymes. This leads to better nutrient absorption compared to cold, raw salads. I noticed a massive difference in my own bloating when I made the switch. I used to buy those pre-packaged raw kale salads at Whole Foods every Tuesday. By 2 PM, my stomach would inflate like a balloon. The raw cellulose is just too hard to break down when your digestive fire is already sluggish from the cold weather. Gently heating your vegetables changes the cellular structure. It makes the nutrients bioavailable without requiring your stomach to work overtime. I tell all my nutrition clients to stop eating raw salads from November to March. It’s a simple fix that yields immediate results. Plus, a warm meal simply feels better when the temperature drops. I’m not talking about soggy, over-boiled vegetables. I mean strategically heated grains, roasted roots, and proteins mixed with greens that just barely wilt from the residual heat. We’re going to build hearty foundations that actually keep you full until dinner. When you consume warm foods, your body doesn’t have to expend extra energy bringing the food up to body temperature before digestion can begin. This is particularly beneficial for individuals with digestive sensitivities. I’ve learned this the hard way after years of ignoring my own gut health and forcing down raw smoothies in freezing weather. Now, I prioritize warmth. It’s not just about comfort. It’s a functional approach to eating that respects your body’s seasonal needs. Trust me on this.
1. The Farro and Roasted Butternut Base

Let’s start with a hearty foundation. I build most of my winter bowls on ancient grains. They provide a satisfying chew and essential fiber that plain lettuce lacks. My standard base is a 1/2 cup serving of cooked Bob’s Red Mill Organic Farro. I usually grab a 16oz bag for $4.39 at Target. It cooks up plump and nutty, holding its texture for days in the fridge. I pair this with roasted butternut squash. The key here is mastering the art of roasted vegetables for deep flavor. I cut the squash into precise 1-inch pieces. If you cut them unevenly, half will burn to a crisp while the other half stays raw and crunchy in the center. I toss the cubes with 2 tablespoons of California Olive Ranch Everyday Extra Virgin Olive Oil. A 16.9 fl oz bottle runs about $11.99. I add coarse salt and black pepper, then roast at 400 degrees Fahrenheit for 25 minutes. The edges get caramelized and sweet. I made the mistake of using cheap, refined oil for roasting once. The smoke alarm went off, and the squash tasted like burnt plastic. Always use a quality oil with a decent smoke point. You toss the hot squash directly into the cooked farro. The residual heat melds the flavors together instantly. The farro absorbs the seasoned oil from the hot cast iron pan, coating every grain. It’s a dense, filling combination that prevents the 3 PM sugar crash. I prep a large batch of this on Sundays and eat it through Thursday.
2. Wilted Kale with Sous Vide Chicken

Raw kale is a chore to chew. I refuse to eat it raw anymore. Instead, gently wilt sturdy greens with warmth. Don’t overcook them. For optimal texture, I massage 1 cup of chopped kale with 1 tablespoon of warm vinaigrette until it becomes bright green and slightly softened. You want it tender, not mushy. I top this wilted base with lean protein for sustained satiety. Specifically, I use sous vide chicken. This is a trending approach for 2026, and it yields unmatched tenderness. I buy boneless, skinless Bell & Evans Organic Chicken Breasts at Sprouts. They typically cost $9.99 per pound. I cook them using the sous vide method at 150 degrees Fahrenheit for exactly 2 hours. I tried baking chicken breasts for years, and they always ended up dry, chalky, and stringy. The sous vide method traps the moisture entirely inside the bag. When you slice the warm chicken and lay it over the massaged kale, the heat from the meat further softens the greens. It’s a textural contrast that works perfectly. The chicken provides 4 ounces of cooked protein per serving. This ensures you stay full and energized throughout the afternoon. If you don’t have a sous vide machine, a gentle stovetop poach works too, but the texture won’t be quite as silky. The combination of the dark, earthy greens and the clean, savory chicken is my go-to lunch on busy clinic days when I need fuel without a heavy feeling. You might also like: 15 Lovely High Protein Low Calorie Dinner Ideas for a Fresh New Look

Super Easy Air Fryer Cookbook for Beginners: Quick, Simple
Super Easy Air Fryer Cookbook for Beginners: Quick punches above its price. I would buy it again.
3. The Air Fryer Brussels Sprout Bowl

The air fryer is a highly efficient tool for creating perfectly crisp warm salad components. I use it constantly for Brussels sprouts. I preheat my air fryer to 375 degrees Fahrenheit. I toss 1 cup of halved Brussels sprouts with 1 teaspoon of olive oil and a heavy pinch of sea salt. I air fry them for 18 minutes, shaking the basket halfway through. They come out with crispy, shattered outer leaves and tender, bright green centers. I used to roast them in the oven on a sheet pan, but they took 40 minutes and heated up my entire kitchen. The air fryer cuts the time in half and delivers a superior crunch. Once the sprouts are done, I transfer them to a wide bowl and finish with a crunch and essential healthy fats. I sprinkle 2 tablespoons of Blue Diamond Sliced Almonds over the top. I buy the large bulk bags at Costco, but a standard 6oz bag costs about $4.99 at regular grocery stores. These healthy fats are crucial for nutrient absorption and promoting satiety. The toasted almonds provide a delicate, brittle crunch that contrasts with the dense, meaty sprouts. I learned early on that skipping the fat leaves you hungry an hour later. The almonds fix that problem entirely. I usually add a spoonful of cooked quinoa to this mix to round it out into a full meal. The bitter notes of the sprouts balance beautifully with the nutty almonds and grains. You might also like: 10 High Protein Meals Dinner Worth Trying
4. Crispy Chickpea and Sweet Potato Mash-Up

Sometimes I don’t want meat, but I still need significant protein to get through the day. That’s when I choose quality canned chickpeas and roast them for a crunchy element. I opt for low-sodium varieties exclusively. Westbrae Natural Organic No-Salt-Added Garbanzo Beans are my standard choice. They cost about $2.79 for a 15oz can at Kroger. The texture is firm, not mushy or chalky like cheaper store brands. I drain and thoroughly rinse 1 can of chickpeas under cold water. I pat them completely dry with a paper towel. If you skip the drying step, they will steam in the oven instead of crisping. I toss them with 1 tablespoon of olive oil, a heavy dash of smoked paprika, and ground cumin. I roast them in the oven at 400 degrees Fahrenheit for 25 minutes. They turn into crunchy, savory little croutons. I pair these with diced, warm sweet potatoes. The sweet and savory combination is highly effective. You get the soft, yielding texture of the roasted sweet potato against the hard, spiced crunch of the roasted chickpea. I made a batch of these last Tuesday and left them on the cooling rack on the counter. My husband ate half the pan before I even assembled the bowls. It’s a simple, plant-based option that delivers roughly 12 grams of protein per serving. The spices bloom in the heat of the oven, creating an aromatic base that requires very little additional dressing to taste complete. You might also like: 9 Spinach Salad Recipes That Actually Work
5. Warm Lentil and Perdue Chicken Skillet

Skillet meals transition perfectly into warm bowls with very little extra effort. I rely on brown lentils for this specific preparation. They cook quickly and hold their shape better than red lentils, which tend to turn into mush. I power up with lean protein by adding grilled chicken to the skillet. I typically purchase Perdue Harvestland No Antibiotics Ever Chicken Breast. The price varies by weight, usually running around $6.48 per pound at Walmart. I pan-sear 4 ounces of the chicken until it reaches an internal temperature of 165 degrees Fahrenheit. I let it rest on a cutting board before slicing it into strips. Meanwhile, I warm up a cup of pre-cooked brown lentils in the exact same skillet. The lentils absorb the savory fond left behind by the chicken fat. I toss in a large handful of fresh spinach at the very end. You must avoid overcooking to preserve nutrient integrity. A common mistake is cooking greens until they turn gray, stringy, and slimy. When sautéing greens like spinach, I cook them only until they are just wilted. This takes exactly 1 to 2 minutes on medium heat. The residual heat from the lentils is usually enough to wilt the spinach without turning on the burner again. I scrape the entire mixture into a wide bowl and top it with the sliced chicken. It’s an iron-rich, high-protein meal. The earthy lentils ground the dish, while the spinach provides a fresh, mineral note.

Air Fryer Cookbook: 600 Effortless Air Fryer Recipes for
If you want something that just works, Air Fryer Cookbook: 600 Effortless Air Fryer Recipes for Beginners and is a safe bet.
6. The Fermented Gut-Health Grain Bowl

Gut health is a priority in my nutritional practice, especially during cold and flu season. I boost gut health with fermented ingredients whenever possible. This is a significant trend in clinical nutrition right now, and it translates perfectly to home cooking. I add a tablespoon of kimchi or sauerkraut to my warm bowls. It provides live probiotics and a sharp, tangy flavor that cuts through heavy, starchy grains. I look for unpasteurized brands in the refrigerated section. Shelf-stable cans don’t have the live bacteria you need. Kimchi Kooks Vegan Kimchi is excellent, running $7.99 for a 16oz jar. Alternatively, Bubbies Sauerkraut costs $6.49 for a 25oz jar. I usually grab Bubbies at Trader Joe’s or my local co-op. The trick here is strict temperature management. You can’t heat the fermented foods directly, or you will kill the beneficial bacteria instantly. I build a base of warm millet and steamed broccoli. Then, I add the cold sauerkraut directly on top right before eating. The contrast between the hot grains and the cold, crisp kraut is highly satisfying. I tried mixing the kimchi into a hot pan of rice once. It instantly destroyed the crunchy texture and muted the sour punch. Keep the ferments raw and separate until plating. The warm base gently takes the chill off the kraut without destroying its probiotic value. This bowl is incredibly effective for digestion and keeps my immune system functioning properly.
7. The Cranberry Surprise Quinoa Salad

Texture fatigue is a real problem with grain bowls. When everything is soft, your brain gets bored halfway through the meal. To fix this, I introduce a surprise sweet and tangy element. I incorporate rehydrated cranberries. Dried cranberries straight from the bag are too chewy, dry, and often get stuck in your teeth. Instead, I steep 1/4 cup of dried cranberries in warm apple juice for 10 minutes. They plump up and become incredibly juicy, almost like fresh berries. I drain them and mix them into warm quinoa. Next, I craft my own healthy dressings to avoid hidden sugars. Store-bought dressings like Thousand Island or raspberry vinaigrette are packed with cheap soybean oils and corn syrups. I prepare a simple vinaigrette from scratch. I use 3 parts Colavita Extra Virgin Olive Oil. A 34 fl oz bottle costs about $17.98 at Safeway. I mix it with 1 part fresh lemon juice for acidity. I enhance the emulsion with a dollop of Grey Poupon Dijon Mustard, which is $3.99 for a 10oz jar. I whisk this together until it thickens and turns opaque. I pour 1 tablespoon of this dressing over the warm quinoa and plumped cranberries. The warm grains absorb the dressing instantly, locking in the flavor. The bursts of sweet cranberry cut through the sharp Dijon mustard perfectly. It’s a complex flavor profile that takes less than five minutes to assemble.
Final Thoughts on Mastering Warm Bowls
Transitioning away from cold, raw salads in the winter completely changed my approach to weekday lunches. I no longer dread eating my vegetables when the temperature drops below freezing. These warm salad recipes provide the necessary comfort of a hot meal while delivering the exact same, if not better, nutritional profile as a summer salad. The key to making this lifestyle stick is preparation. I cook my grains on Sunday afternoon. I roast two large sheet pans of assorted vegetables on Monday night. By Wednesday, I’m just assembling components from the fridge and heating them up in a skillet. It takes less time than waiting in the drive-thru line at a fast-casual salad restaurant. Remember to watch your temperatures closely. Keep your ferments cold, your grains piping hot, and your delicate greens just barely wilted. If you follow these structural rules, you won’t end up with a soggy, unappetizing mess. I highly recommend investing in a good set of glass storage containers with locking lids to keep your prepped ingredients fresh and organized. I use the Pyrex 3-cup rectangular dishes constantly. They stack perfectly in the fridge and are microwave-safe for quick reheating at the office. Start with the farro and butternut squash base. It’s the most forgiving recipe if you’re new to the concept of heating your salads. Pin this article for your next Sunday meal prep session, and let me know which combination works best for your digestion.
Frequently Asked Questions
What are the benefits of warm salad recipes?
Warm salads are gentler on digestion and activate enzymes, making nutrients from vegetables easier to absorb compared to raw, cold salads.
How do I prevent greens from getting soggy in a warm salad?
Only add sturdy greens like kale or spinach at the very end. Let the residual heat from the grains or proteins gently wilt them for 1-2 minutes.
What are the best grains for a warm salad?
Ancient grains like farro, einkorn, and quinoa hold up best to heat. They maintain a firm, chewy texture that won’t turn to mush when mixed with warm dressings.
Can I meal prep warm salads?
Yes. Store your cooked grains, roasted vegetables, and proteins separately in glass containers. Heat them up, then add your fresh greens and raw fermented toppings right before eating.
