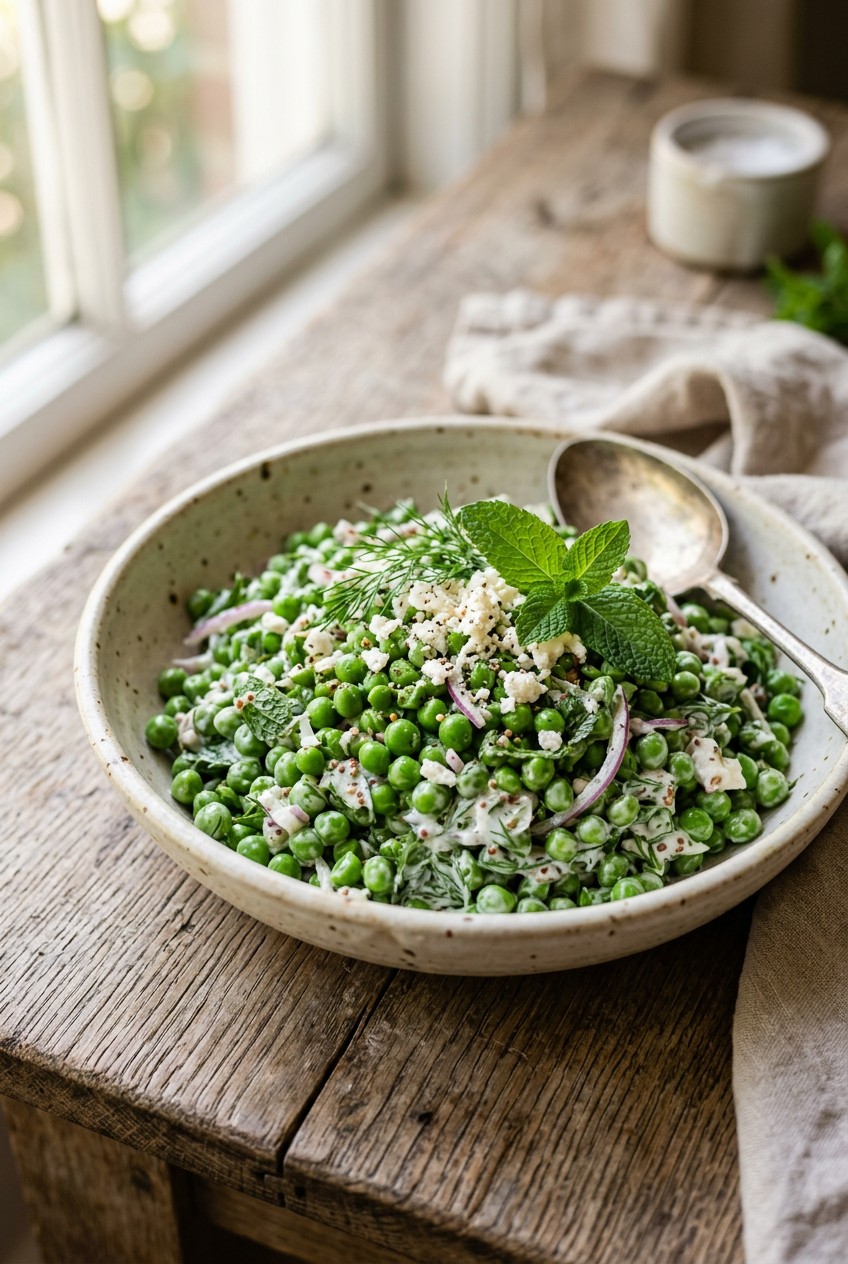
What’s Inside
- Start With Frozen Peas (Never Canned) For Your Pea Salad Recipes
- Thaw Properly To Avoid A Watery Mess
- Lighten Up The Dressing With Greek Yogurt
- Choose Healthier Mayonnaise Brands If You Must
- Mellow Your Red Onions With Apple Cider Vinegar
- Add Unexpected Fresh Herbs Like Mint
- Swap Greasy Pork Bacon For Turkey Or Almonds
- Toss In Radishes For A Peppery Crunch
- Boost Protein With Hard-Boiled Eggs Or Chickpeas
- Add Canned Water Chestnuts For Unique Texture
- Experiment With Feta Or Dairy-Free Cheese Blocks
- Never Skip The Chill Time For Better Pea Salad Recipes
Last Tuesday at Whole Foods, I dropped a glass jar of pricey mayo right in the middle of the aisle. It shattered. A sticky, oily mess that smelled like lemon and regret. I was rushing to grab ingredients because I was obsessed with finding cheap, healthy meals. That’s how I stumbled into testing endless pea salad recipes. Most traditional ones are drowning in cheap soybean oil and sugar. I spent weeks trying to fix this. I wanted a side dish that was crunchy, fresh, and good for my body. I also refused to spend twenty dollars on a single bowl of veggies. After ruining several batches and eating a lot of watery mistakes, I finally figured out the formulas. I’m going to share exactly what brands to buy, how much they cost, and the techniques I use to keep everything crisp. Let’s fix your meal prep without emptying your wallet.
1. Start With Frozen Peas (Never Canned) For Your Pea Salad Recipes

I can’t stress this enough. Skip the canned peas. They taste like wet cardboard and turn an unappetizing shade of gray green. Last Thanksgiving at my mom’s house in Chicago, she made a vintage side dish with canned peas. The texture was pure mush. It squished terribly against my teeth. Just awful. Always opt for frozen peas for peak freshness and a crisp bite. They’re flash-frozen right after picking. This locks in that bright, vibrant green color and sweet flavor. I’m a huge fan of the 16-ounce bag of Birds Eye Sweet Peas. You can usually find them at Target for around $2.49. Sometimes they go on sale for $2.00. Grab three bags when they do. It’s the cheapest base for any meal prep. For the best texture, you want a firm pop when you bite into them. Canned peas simply won’t give you that. Plus, frozen peas hold up beautifully when mixed with heavy dressings. If you use canned peas, your dish will turn into a soupy disaster within an hour. Don’t make that mistake. Stick to the frozen aisle. Your wallet and your taste buds will thank you.
2. Thaw Properly To Avoid A Watery Mess

So you bought the frozen peas. Now you have to thaw them correctly. I tried this wrong for months before figuring it out. Back in April, I dumped a frozen bag straight into my mixing bowl. The ice crystals melted directly into my dressing. It created a milky, watery puddle at the bottom of the bowl. Gross. The trick is to thaw them quickly but completely. Pour your 16-ounce bag of frozen peas into a mesh strainer. Run them under cool tap water for exactly two minutes. Don’t use warm water. Warm water cooks the skins and makes them wrinkly. Shake the strainer vigorously. Then, pour the peas onto a double layer of Bounty Select-A-Size Paper Towels. A 2-pack usually runs about $4.48 at Walmart. Pat them completely dry. If you skip the drying step, your dressing won’t cling to the peas. They need to remain cold and firm. If you let them sit on the counter for hours, they get too soft. A watery salad is the enemy of good meal prep. It ruins the whole texture. Take the extra three minutes to dry them. It makes a massive difference in the final crunch.
3. Lighten Up The Dressing With Greek Yogurt

Traditional Southern salads use cups of heavy mayonnaise. I can’t stomach that much grease. It leaves a thick, oily film on the roof of your mouth. Instead, replace half or all of the mayonnaise with plain, non-fat Greek yogurt. This cuts the fat drastically and gives you a nice protein boost. For a large 24-ounce bag of peas, I use a strict one-to-one ratio. I mix 1/2 cup of Hellmann’s Light Mayonnaise. A 20-fluid-ounce squeeze bottle usually costs $4.99 at Kroger. Then I blend it with 1/2 cup of Fage Total 0% Milkfat Plain Greek Yogurt. The 17.6-ounce tub is about $3.99. The yogurt adds a sharp, tangy zip that cuts through the sweetness of the peas. It’s incredibly refreshing. I served this version at a neighborhood block party last summer. I didn’t tell anyone it was lightened up. Nobody noticed. They just kept asking why it tasted so fresh. Just be careful not to use vanilla yogurt by mistake. I did that once in college. It was a sugary, confusing disaster that went straight into the trash. Always double-check the label for plain.

The Healthy Family Cookbook: 100 Fast and Easy Recipes for
The Healthy Family Cookbook: 100 Fast and Easy Recipes for the Whole F punches above its price — 967 buyers rated it 4.5 stars. I would buy it again.
4. Choose Healthier Mayonnaise Brands If You Must

Sometimes you just really want that classic, rich mayonnaise flavor. I get it. But skip the cheap stuff made with inflammatory soybean or canola oils. They taste artificial and leave a weird chemical aftertaste. If you’re going to use real mayo, buy the good stuff. Dietitians always recommend brands made with pure avocado oil or olive oil. My absolute favorite is Chosen Foods 100% Pure Avocado Oil Classic Mayo. A 12-ounce jar costs exactly $7.99 at Sprouts. Yes, it’s pricier than the store brand. But you only need 1/4 cup for a standard batch. The flavor is incredibly smooth, slightly nutty, and totally clean. Another great option is Primal Kitchen Mayo with Avocado Oil. That one runs between $7.99 and $10.99 for a 12-ounce jar depending on sales. The texture is slightly thicker. It coats the peas beautifully without turning into a runny glaze. I used cheap soybean mayo for years because I was broke. My stomach always felt heavy and bloated afterward. Switching to avocado oil mayo fixed that completely. It’s a small upgrade that drastically improves how you feel after eating. You might also like: 20 Gorgeous Healthy Lunch Ideas That Make a Real Difference
5. Mellow Your Red Onions With Apple Cider Vinegar

Raw red onion adds a crucial, sharp bite. But its pungency can easily ruin a delicate dish. I once ruined a perfectly good lunch by throwing in a whole cup of raw, harsh onions. My breath smelled like sulfur for two days. The onion completely overpowered the sweet peas. Never again. Here is the secret to getting the crunch without the aggressive burn. Finely dice exactly 1/4 cup of red onion. Place the diced pieces in a small glass bowl. Pour in a splash of Bragg Organic Apple Cider Vinegar with the Mother. A 16-ounce glass bottle is usually $6.49 at Whole Foods. Let the onions soak in the vinegar for 10 to 15 minutes. This simple acid bath mellows out the harsh sulfur compounds. The onions turn slightly pink and develop a sweet, pickled flavor. After soaking, drain them well before tossing them into your bowl. You get all that wonderful crispy texture without the aggressive onion breath. It balances the entire flavor profile. Plus, the slight residual vinegar adds a bright, acidic pop that wakes up the creamy dressing. It’s a tiny extra step that yields amazing results. You might also like: 15 Gorgeous Easy Healthy Snack Ideas That Changed Everything
6. Add Unexpected Fresh Herbs Like Mint

Most people just dump in dried dill or boring curly parsley. That’s fine, but it’s incredibly boring. Dried herbs often taste dusty and stale if they’ve been sitting in your pantry for a year. I highly recommend using fresh herbs. Specifically, fresh mint. It sounds weird, but mint and peas are a classic flavor pairing in British cooking. The cool, refreshing bite of mint completely changes the dish. For a 16-ounce bag of peas, I tear up exactly 1/4 cup of fresh mint leaves. Don’t chop them with a dull knife. That just bruises the leaves and turns them black. Tear them gently with your fingers right before serving. You can buy a small plastic clamshell of fresh mint at Trader Joe’s for $1.99. It smells incredibly bright and herbaceous. If mint isn’t your thing, fresh chives are a fantastic alternative. They offer a mild, garlicky onion flavor without being aggressive. I tried using dried mint once because I was feeling lazy. It tasted like I emptied a tea bag into my lunch. Horrible mistake. Always use fresh herbs. They provide a vibrant pop of green and massive flavor. You might also like: 20 Beautiful Low Calorie Dinner Ideas to Transform Your Space

Air Fryer Cookbook: 600 Effortless Air Fryer Recipes for
Honestly, Air Fryer Cookbook: 600 Effortless Air Fryer Recipes for Beginners and surprised me — sturdier than it looks in the photos.
7. Swap Greasy Pork Bacon For Turkey Or Almonds

Bacon is a staple in these creamy side dishes. But regular pork bacon is greasy, heavy, and shrinks down to nothing in the pan. I hate cleaning up bacon grease splatters from my stovetop. It takes forever. Instead, I use cooked and crumbled turkey bacon. My go-to is Oscar Mayer Turkey Bacon. You can grab a large 3-pack at Costco for about $14.99, which breaks down to roughly $5 per 12-ounce package. I bake it on a sheet pan at 400 degrees until it’s super crispy. Then I chop it into tiny bits. You need about 1/2 cup of crumbled bacon per 16 ounces of peas. It gives you that salty, smoky crunch without the pool of rendered fat. If you want a completely plant-based option, smoky roasted almonds are brilliant. I use 1/2 cup of Blue Diamond Smokehouse Almonds. A 6-ounce can is $3.98 at Walmart. Give them a rough chop. They mimic the crunch and smoke of bacon perfectly. I brought the almond version to a picnic last month. The nuts stayed incredibly crunchy even after sitting out for two hours. Pork bacon would have turned soggy and sad.
8. Toss In Radishes For A Peppery Crunch

You need contrasting textures in a soft bowl of vegetables. Peas are soft. The dressing is creamy. If you don’t add crunch, the whole thing feels like baby food. I absolutely hate mushy textures. I need something to chew on. Thinly sliced radishes are my secret weapon here. They provide a sharp, peppery bite and a gorgeous pop of bright pink color. You need exactly 1/3 cup of thinly sliced radishes per 16 ounces of peas. I usually buy a fresh bunch of organic red radishes at Sprouts for $1.49. Make sure you wash them thoroughly. They hold a lot of grit near the stems. I didn’t wash them well enough once, and my lunch literally crunched with dirt. It was so embarrassing. Use a mandoline slicer to get them paper-thin. Thick chunks of radish are too overpowering and hard to chew. The paper-thin slices fold beautifully into the creamy dressing. They also pack a nice hit of Vitamin C. It’s a totally unexpected ingredient that makes the dish feel fancy and upgraded. Plus, they are incredibly cheap. It’s the most cost-effective way to add volume.
9. Boost Protein With Hard-Boiled Eggs Or Chickpeas

A bowl of peas and mayonnaise won’t keep you full for very long. You’ll be starving an hour later. I used to eat this as a main course for lunch and would end up snacking all afternoon. You have to add protein to make it a substantial meal. Chopped hard-boiled eggs are the classic choice. I use 2 large eggs per 16 ounces of peas. I buy the Good & Gather Organic Cage-Free Large Eggs at Target. A dozen costs $4.69. Boil them for exactly 9 minutes for a firm but creamy yolk. Overcooked eggs with that ugly gray ring smell like sulfur and ruin the aesthetic. If you don’t eat eggs, legumes are fantastic. Toss in 1/2 cup of canned chickpeas. I like the Bush’s Best Garbanzo Beans. A 15-ounce can is usually $1.39. Rinse them incredibly well under cold water until the bubbles stop. The chickpeas add a dense, satisfying chew and a massive dose of dietary fiber. They soak up the tangy yogurt dressing perfectly. Adding protein turns this from a flimsy side dish into a powerhouse lunch that actually sustains your energy levels.

Cathy Yoder’s Air Fryer Cookbook for Two (2026): Easy
If you want something that just works, Cathy Yoder’s Air Fryer Cookbook for Two (2026): Easy is a safe bet.
10. Add Canned Water Chestnuts For Unique Texture

This is my absolute favorite trick for adding crunch without changing the flavor profile. Water chestnuts are incredibly neutral in taste, but they have a loud, satisfying snap. I add 1/2 cup of chopped canned water chestnuts to my bowl. I usually grab a 5-ounce can of La Choy Diced Water Chestnuts at Kroger for $1.79. Here is the critical step. You must drain them and pat them completely dry with a paper towel. If you dump them straight from the can, the briny water will thin out your dressing and make everything sloppy. I skipped drying them once, and my yogurt dressing slid right off the vegetables. It was a watery, unappetizing mess at the bottom of the Tupperware. Just chop them into pieces roughly the same size as the peas. This ensures you get a little bit of everything in every single bite. The water chestnuts stay incredibly crunchy for days in the fridge. They don’t get soft like celery or cucumbers do. It’s a cheap, easy pantry staple that dramatically improves the mouthfeel of your dish.
11. Experiment With Feta Or Dairy-Free Cheese Blocks

Sharp cheddar cheese cubes are the standard addition. But honestly, huge chunks of hard cheese feel heavy and clunky. They don’t integrate well with the tiny peas. I much prefer using a crumbly artisan cheese. Crumbled feta is incredible here. You need about 3 ounces of feta per 16 ounces of peas. The salty, briny punch of the feta cuts right through the creamy dressing. I buy the 8-ounce block of Athenos Traditional Feta Cheese for $5.49 at Target. Always buy the block in brine, not the pre-crumbled stuff. The pre-crumbled cheese is coated in anti-caking powder that makes it taste like chalk. I learned that the hard way when I ruined a beautiful summer dish with dusty, dry cheese. If you are dairy-free, you aren’t left out. The Violife Just Like Feta Block is a fantastic alternative. A 7-ounce block costs about $5.99 at Whole Foods. It crumbles beautifully and has a surprisingly authentic tangy bite. The crumbled texture coats the peas, so you get a hit of salty cheese in every forkful. It’s a massive upgrade from boring cheddar cubes.
12. Never Skip The Chill Time For Better Pea Salad Recipes

This is the most common mistake people make. You mix everything together and immediately serve it. Don’t do that. I did this at a family barbecue two years ago. The dressing was warm, the peas were stark, and the flavors felt completely disjointed. It tasted like raw ingredients coated in mayonnaise. You absolutely must refrigerate the bowl for at least 1 to 2 hours before serving. Overnight is even better. This resting period allows the salt, vinegar, and herbs to penetrate the peas. The flavors meld and deepen into a cohesive dish. I store mine in a Pyrex 4-Cup Glass Storage Container. You can get a 3-pack with lids for $17.98 at Walmart. Press a piece of plastic wrap directly onto the surface of the food before snapping the lid on. This prevents a weird, dry skin from forming on top of the yogurt dressing. The chill time firms up the dressing, so it clings thickly to every single pea. When you finally pull it out of the fridge, give it one massive stir. It tastes completely different after it rests. Patience is literally the most important ingredient here.
I hope these tips change how you prep your meals. I’ve eaten so many terrible, mushy side dishes over the years. You don’t have to suffer through bland, watery vegetables anymore. Just remember to dry your ingredients, upgrade your mayonnaise, and let everything chill in the fridge. These cheap, simple tweaks make all the difference. I’m making a massive batch of the feta and mint version for my lunches this week. You should definitely try it. If you found these ideas helpful, please pin this article to your favorite recipe board on Pinterest. Save it for your next summer barbecue or Sunday meal prep session. Let’s make healthy eating actually taste good.

The Skinnytaste Air Fryer Cookbook: The 75 Best Healthy
If you want something that just works, The Skinnytaste Air Fryer Cookbook: The 75 Best Healthy Recipes for Yo is a safe bet (126 reviews, 4.5 stars).
Frequently Asked Questions
Can I make pea salad recipes ahead of time?
Yes. I actually highly recommend it. Making it 24 hours in advance allows the flavors to meld. Just be sure to dry your ingredients completely before mixing so the dressing doesn’t get watery in the fridge.
How long do pea salad recipes last in the fridge?
Store your leftovers in an airtight glass container. They will stay fresh and crunchy for up to four days. If you use a yogurt-based dressing, give it a good stir before serving to fix any separation.
Are pea salad recipes healthy for weight loss?
They absolutely can be. If you skip the heavy pork bacon and sugary mayonnaise, it’s a great option. I always use non-fat Greek yogurt and add extra protein like chickpeas to keep me full for hours.
Can I freeze leftover pea salad?
No. I’ve tried this and it’s a complete disaster. The creamy dressing separates and turns grainy, while the vegetables turn into pure mush once thawed. You’re better off making smaller batches that you can finish in a few days.

4 thoughts on “12 Pea Salad Recipes You Need to See”