What’s Inside
- The Classic Cinnamon Apple Smoothie Recipes Foundation
- Keep the Skin On For Maximum Nutrition
- The Tart Green Apple and Greek Yogurt Powerhouse
- The 1-to-1 Liquid Rule for Creamy Results
- Stop the Brown Sludge with a Splash of Citrus
- The Peanut Butter Apple Pie Fix
- The Frozen Honeycrisp Time Saver
- Sneaking Greens into Your Morning Routine
- The Beast Blender Upgrade for Single Servings
Last Tuesday at Whole Foods, I dropped a $6.99 bag of Honeycrisp apples right in the produce aisle. They bruised instantly. I scooped them up, paid my shame tax at the register, and realized I had to figure out some quick apple smoothie recipes before they rotted on my counter. I’ve ruined plenty of smoothies by throwing whole apple chunks into a cheap blender. It always tasted like wet sand. The texture was gritty, the flavor was weak, and I usually ended up pouring it down the sink. I learned that the hard way.
But those bruised apples forced me to test different methods. I spent the next week blending, tasting, and adjusting. I’m telling you now, these recipes aren’t complicated. You don’t need fancy powders for a great morning drink. You just need the right technique and a few staples. I’ve figured out how to avoid the grainy textures and bland flavors that ruin most homemade drinks. Let’s walk through the exact methods I use to get a perfectly smooth, sweet, and filling drink every time. I’ll share the tools, measurements, and brands I trust so you can skip the trial and error.
1. The Classic Cinnamon Apple Smoothie Recipes Foundation

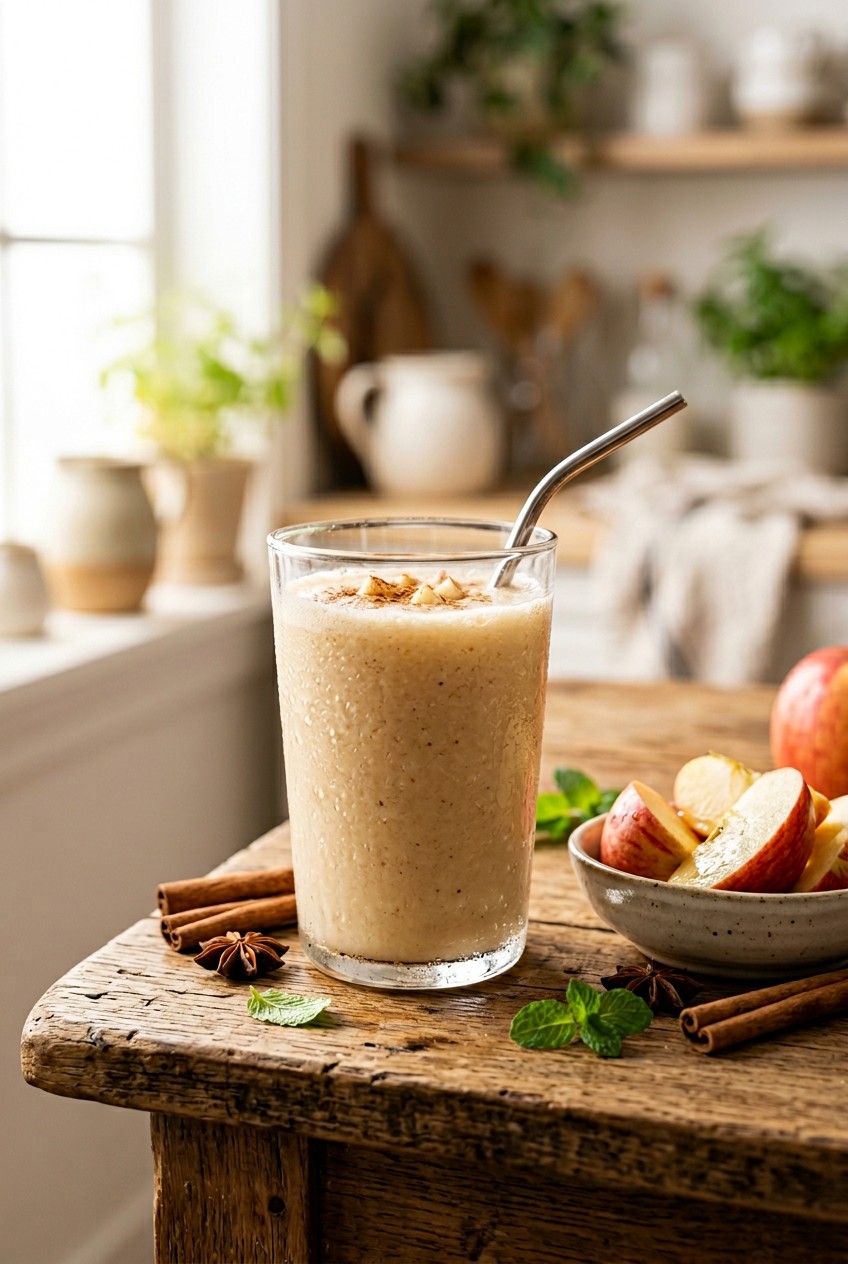
If you want creamy apple smoothie recipes, you have to master the apple-first blending technique. Most people get this wrong. I did it wrong for months. I used to dump everything in at once, hit the button, and pray. The result was always a chunky, grainy mess that got stuck in my straw. Apples have stiff cell walls. You need to break them down first. I take 1 whole Fuji apple, cubed, and 1/2 cup of liquid, then I blend that alone for 40 seconds. I swear by Silk Unsweetened Vanilla Almond Milk for this step. I buy the 64 oz carton at Target for $3.49. Once that base looks like thin applesauce, I add my ice and spices.
You also need a decent machine. I upgraded to the Vitamix E310 Explorian ($322), and the difference in texture is wild. If you’re on a budget, the Ninja Professional Blender is a solid buy for around $100. Just don’t skip the pre-blending step if you’re using the Ninja. The motor needs that head start to get the skin smooth. I remember standing in my kitchen last winter, frustrated because my cheap blender kept leaving huge, sharp chunks of apple skin in my drink. It felt like swallowing plastic. The pre-blending trick solved that. Add 1/2 teaspoon of ground cinnamon at the end. The smell of fresh cinnamon mixing with the sweet apple puree is fall in a cup. It’s warm, comforting, and perfect.
2. Keep the Skin On For Maximum Nutrition

Stop peeling your apples. Seriously, put the peeler down. I used to peel every apple because I was terrified of a gritty texture. Last year, I spent twenty minutes peeling apples for my toddler, ate the discarded skins off the board, and realized how wasteful I was being. The skin is where the good stuff hides. It’s packed with fiber, vitamins A, C, and K, plus antioxidants like quercetin. I read a study showing those compounds help lower cholesterol and support digestion. You’re throwing away the healthiest part of the fruit when you toss the peel.
I buy 2 lb bags of organic Gala apples at Trader Joe’s for $4.99. I wash 1 medium Gala apple, chop it into 4 large pieces, remove the core, and toss it in the pitcher. The red skin gives the drink a pretty, faint pink color. If you use the blending trick I mentioned, you won’t even feel the skin. It disappears into the liquid. It makes the drink thicker and keeps you full for hours. I used to get hungry by 10 AM when I only drank peeled fruit. The extra fiber acts like a sponge in your stomach. It slows down the sugar rush and keeps your energy steady. Plus, the slight bitterness of the skin balances out the sweetness of the Gala apple. You’ll never go back to peeling them.
3. The Tart Green Apple and Greek Yogurt Powerhouse

Sometimes a sweet apple is just too cloying, especially first thing in the morning. When I want a tart kick, I grab 1 large Granny Smith apple. The sharp, acidic bite balances out the creaminess of the dairy. To make this filling, I rely on plain Greek yogurt. I grab Fage Total 0% Greek Yogurt. It costs $6.49 for a 32 oz tub at Kroger and packs 18 grams of protein per serving. I measure out 1/4 cup of the yogurt and drop it in. Skip the fat-free stuff if you’re buying flavored yogurt. It tastes like wet cardboard and is usually packed with fake sugars. You might also like: 15 Clever Kids Healthy Breakfast Ideas for a Fresh New Look
Stick to the plain, thick Greek style. I made the mistake of adding a full cup of yogurt once, and it overpowered the fruit. It tasted like sour milk mixed with grass. I had to spit it out into the sink. Stick to the 1/4 cup measurement. It adds creaminess without muting the tart green apple flavor. The texture becomes almost like a drinkable cheesecake. It’s thick, tangy, and satisfying when you’re rushing out the door. The cold yogurt also helps cool down the blender blades, so your drink stays frosty. I love the contrast between the zesty green apple smell and the rich, fermented tang of the yogurt. It’s a flavor combination I crave every week. You might also like: 15 Clever Aesthetic Healthy Lunch Ideas to Inspire Your Next Project

nutribullet Personal Blender, Shakes, Smoothies, Food Prep
nutribullet Personal Blender punches above its price — 543 buyers rated it 4.5 stars. I would buy it again.
4. The 1-to-1 Liquid Rule for Creamy Results

I can’t tell you how many times I’ve ruined a good batch of ingredients by eyeballing the milk. Last month, I was distracted by a phone call and poured oat milk until it looked full. The result was a watery, sad, beige puddle that splashed everywhere. It looked terrible and tasted worse. You have to follow the 1-to-1 liquid-to-solid ratio. It’s a hard rule in my kitchen now. If I have 1 cup of chopped fruit, I use exactly 1 cup of liquid. My current obsession is Malk Oat Milk. I get the 28 oz bottle for $5.99 at Sprouts. It has a clean, earthy taste that pairs beautifully with the fruit. You might also like: 15 Beautiful Wonyoungism Healthy Breakfast Ideas That Make a Real Difference
If you want a thicker, spoonable texture, don’t add more ice. Just reduce the liquid by 1/4 cup. Pouring your liquid into a measuring cup takes two seconds and saves you from a watery disaster. The Malk brand is slightly thicker than regular almond milk, so it gives the final product a rich, velvety mouthfeel that coats the back of a spoon. I used to think I could guess the amounts, but the blender is unforgiving. Too much liquid and the blades just spin the fruit around without grabbing it. The 1-to-1 ratio forces the ingredients into the vortex, creating that perfect, creamy swirl you only get at expensive juice bars.
5. Stop the Brown Sludge with a Splash of Citrus

There is nothing less appetizing than a brown smoothie. If you prep your ingredients ahead of time, or if you don’t drink your cup immediately, the chopped fruit will oxidize and turn a nasty, muddy color. I used to make my breakfast, leave it in my car cup holder, and by the time I parked, it looked like swamp water. The smell was fine, but visually, it was repulsive. The fix is simple. You just need a splash of citrus. The ascorbic acid stops the browning process. I keep a bottle of Santa Cruz Organic Pure Lemon Juice in my fridge. It’s $4.79 for a 16 oz bottle at Whole Foods.
I toss my chopped apple slices in 1 teaspoon of the lemon juice before I freeze or blend them. It doesn’t make the drink taste sour. The lemon brightens the flavor profile and makes it taste fresher. The visual difference is huge. Your drink stays a vibrant, pale cream color for hours. It looks so much more appetizing when you sit down at your desk. I tried using lime juice once when I ran out of lemon, and it clashed horribly with the cinnamon. Stick to the lemon juice. It’s a tiny extra step that changes the presentation, especially if you’re making it for someone else.
6. The Peanut Butter Apple Pie Fix

If you’re drinking this as a meal replacement, you need healthy fats to keep your blood sugar stable. An apple and milk won’t keep you full past 10 AM. I always add 1 heaping tablespoon of nut butter. Peanut butter is my go-to because it reminds me of eating apple slices with peanut butter as a kid. I strictly use Justin’s Classic Peanut Butter. A 16 oz jar is $5.49 at Walmart. It only contains peanuts and palm oil, so it doesn’t have an artificial, sugary taste. The thick, sticky texture binds everything together.
I made the mistake of using a cheap, sugary peanut butter once, and it made the whole thing taste like melted candy. It was awful. I felt sick an hour later. Stick to the natural stuff. When the peanut butter blends with the cold milk and sweet fruit, it creates a rich, nutty undertone that tastes exactly like liquid apple pie. The smell is incredible. It smells roasted and sweet, and it masks any green flavors if you decide to add spinach. The fat from the peanuts slows down digestion, meaning you won’t get that mid-morning sugar crash. I recommend stirring the peanut butter well before scooping. If you grab the dry stuff at the bottom, it won’t blend smoothly. It’ll just stick to the pitcher in a lump.

Ninja Fit Compact Personal Blender | Portable Blender for
Ninja Fit Compact Personal Blender | Portable Blender for Smoothies punches above its price — 415 buyers rated it 4.5 stars. I would buy it again.
7. The Frozen Honeycrisp Time Saver

Ice is the enemy of flavor. If you dump a handful of ice cubes into your blender, you’re just watering down your expensive ingredients. I learned this after making a batch that tasted like lightly flavored water. It was disappointing. Now, I freeze my fruit instead. On Sunday afternoons, I chop three large Honeycrisp apples, toss them in that teaspoon of lemon juice, and lay them flat in Ziploc freezer bags. I buy the 38-count box of gallon Ziploc bags at Costco for $4.99. When I wake up on a busy Tuesday, I just grab 1.5 cups of the frozen chunks. They act as the ice.
As they break down, they create a frosty, thick texture without diluting a single drop of flavor. Honeycrisp apples are naturally sweet and juicy, so they freeze beautifully. The sound of those rock-hard chunks hitting the blender blades is deafening for the first ten seconds, but the resulting texture is identical to soft-serve ice cream. It’s thick enough that I usually have to eat it with a spoon. If you freeze them flat, they won’t clump together in a massive ice block. I ruined a blender blade once by trying to process a giant, frozen brick of apples. Spread them out, freeze them flat, and thank me later. This prep step saves me five minutes of chopping and coring every morning.
8. Sneaking Greens into Your Morning Routine

I know adding spinach to a sweet fruit drink sounds suspicious, but I promise you won’t taste it. I avoided green drinks for years because I thought they tasted like lawn clippings. But apples have such a dominant flavor that they hide the earthy taste of the greens. I buy the 5 oz clamshell of Earthbound Farm Organic Baby Spinach at Target for $3.99. I grab 1 tightly packed cup of the fresh spinach leaves and shove them into the blender on top of the fruit. You have to use baby spinach. Mature spinach has thicker stems that leave a stringy, fibrous texture that gets caught in your teeth.
The baby leaves are tender and blend completely smooth. The color of the drink turns a vibrant green, which looks cool in a clear mason jar. Just don’t smell the blender right after you add the spinach. The raw, grassy smell is strong before it mixes with the fruit. Once it’s fully blended, all you smell is the sweet apple and cinnamon. I tried using kale last month, and it was a disaster. The kale was too bitter and overpowered the delicate apple flavor. Stick to the baby spinach. I usually rinse the spinach even if the box says it’s pre-washed. I’ve found grains of sand in unwashed spinach, and nothing ruins a creamy drink faster than biting down on sand. Trust me.
9. The Beast Blender Upgrade for Single Servings

If you live alone or hate washing a massive 64 oz blender pitcher every morning, you need a personal blender. I burned out the motor on a cheap single-serve blender last year. I packed too much frozen fruit into the tiny cup, and the machine started smoking. The smell of burning rubber filled my kitchen, and I had to toss the whole thing. After that, I bought the new 2026 model of the Beast Blender. It costs $165, and it’s the most beautiful appliance on my counter. The ribbed glass vessel is thick and doesn’t hold onto weird smells like cheap plastic cups.
For my single-serving recipe, I add my fruit, milk, and 1 tablespoon of chia seeds for extra fiber. I get the Kirkland Signature Organic Chia Seeds at Costco. A massive 3 lb bag is only $7.49 and lasts for months. The Beast Blender destroys the tiny chia seeds in seconds, leaving zero grit behind. You just unscrew the blade, pop on the drinking lid, and walk out the door. It saves me ten minutes of clean-up time every morning. I don’t have to scrub a massive pitcher or deal with a heavy base. I rinse the blade under hot water and I’m done. If you let the chia seeds sit in the liquid for a few minutes before blending, they soften up and create an even thicker, pudding-like consistency.
I’ve spent way too much time testing these methods, but it’s changed my breakfast routine. You don’t have to suffer through watery, gritty drinks anymore. Grab a bag of apples, pick one of these techniques, and see how much better your mornings feel. I recommend starting with the frozen Honeycrisp method. It’s foolproof and tastes like a frozen dessert. Plus, it saves you so much time during the morning rush. Pin this page so you don’t forget the liquid ratios the next time you’re standing in your kitchen at 6 AM. I’m always looking for new variations, so if you try the peanut butter trick or find a new way to sneak in greens, let me know. I’d love to hear how these work out in your own kitchen.

Air Fryer Cookbook: 600 Effortless Air Fryer Recipes for
Air Fryer Cookbook: 600 Effortless Air Fryer Recipes for Beginners and punches above its price. I would buy it again.
Frequently Asked Questions
Can I use whole apples in a smoothie?
Yes, but you need to blend them first. Chop the apple and blend it with your liquid for 40 seconds before adding ice or other ingredients to avoid a grainy texture.
Should I peel the apple for a smoothie?
No, keep the skin on. It contains essential fiber and antioxidants. If you pre-blend the apple with your liquid, the skin breaks down completely and won’t affect the texture.
How do I stop my apple smoothie from turning brown?
Add exactly one teaspoon of lemon juice to your chopped apples before blending. The citric acid prevents oxidation and keeps the drink a vibrant, fresh color for hours.
What is the best liquid to solid ratio for smoothies?
Use a strict 1-to-1 ratio. For every one cup of chopped fruit, use exactly one cup of liquid like almond or oat milk. This guarantees a creamy texture instead of a watery mess.
