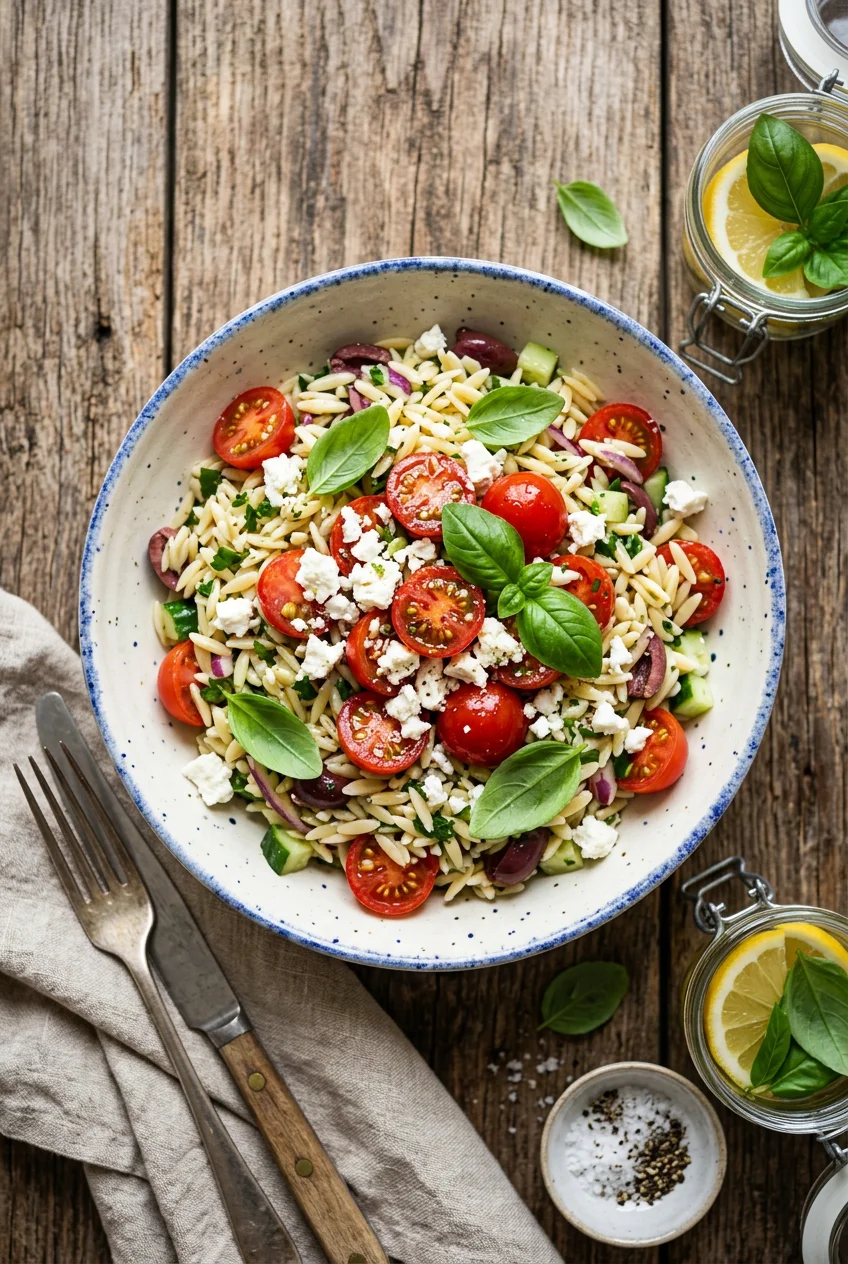
What’s Inside
- The Foundation of Cold Orzo Salad: Boiling and Salting
- Stopping the Cook: The Cold Rinse and Oil Method
- The Secret to Flavor: Dressing While Warm
- Adding Plant-Based Protein for a Power Bowl
- Precision Chopping: The One-Cup Rule
- Blanching Hard Vegetables for Better Texture
- Embracing Juicy Ingredients for Lasting Moisture
- The 2026 Fermentation Trend: Miso and Kimchi
- Fresh Herbs and Proper Chilling Times
Last Tuesday at Whole Foods, I watched a woman buy three tubs of their pre-made Mediterranean pasta salad. I wanted to tell her that making cold orzo salad at home takes twenty minutes and doesn’t taste like refrigerated plastic. My first attempt at a cold pasta bowl in 2019 was a disaster. I ended up with a solid brick of starch that tasted like tap water and disappointment. The dressing pooled at the bottom in a greasy puddle, the vegetables were soggy and gray, and the pasta itself was aggressively chewy. I remember standing in my kitchen, scraping it into the trash can, frustrated by the waste of expensive ingredients. Since then, I’ve figured out the exact science of chilling small pasta. It requires a specific sequence of temperature changes and precise chopping. I’m highly particular about texture, and this method prevents the dreaded mushy pasta syndrome. Trust me on this. Here is how you build a high-protein version that actually lasts in the fridge without drying out by day two.
1. The Foundation of Cold Orzo Salad: Boiling and Salting

The foundation of any good batch of cold orzo starts in the boiling water. I buy the 16 oz box of Barilla Orzo for $1.84 at Target. You can use the Great Value brand from Walmart for $0.98, but I find the Barilla holds its shape slightly better when chilled. You need a large pot with at least four quarts of water rolling at a rapid boil. If you crowd the pasta in a small saucepan, the temperature drops too fast when you add the dry grains, leading to uneven cooking. The biggest mistake people make is under-salting the water. Cold temperatures mute flavors significantly. You need exactly 1 tablespoon of kosher salt for every pound of dry orzo. This seasons the pasta from the inside out. When you boil it, ignore the package instructions completely. Cook the orzo for exactly one minute longer than the box suggests. You want it just past al dente. If you pull it at the normal time, the grains turn chewy and hard once they sit in the refrigerator. Overcook it by three minutes, and you get mush. That one extra minute is the sweet spot for a cold salad. I tried following the box directions for months before realizing the refrigeration process actually firms up the starches. You have to overcompensate slightly during the boil.
2. Stopping the Cook: The Cold Rinse and Oil Method

Hot pasta continues to cook in the colander. If you leave it alone, it releases starch and glues itself into a massive clump. I learned this the hard way when I had to throw away an entire batch before a neighborhood barbecue. The moment you drain the pasta, run it under freezing cold water for sixty seconds. I use a fine-mesh stainless steel strainer rather than a standard colander because the tiny orzo grains tend to escape through larger holes. I rest it in the sink and use the spray nozzle attachment to ensure every single grain gets hit with the freezing water. You’re washing away the surface starch and stopping the cooking process dead in its tracks. Once the water runs clear and the pasta feels cool to the touch, shake the colander vigorously to remove excess water. Immediately toss the rinsed grains with 1 tablespoon of high-quality oil. I use Corto Truly 100% Extra Virgin Olive Oil. A 500ml bottle costs about $24.99, but you only need a tiny amount here. This creates a lipid barrier around each piece of pasta. I used to buy the cheap store-brand oil at Trader Joe’s for this step, but it left a greasy film on the roof of my mouth. The Corto oil keeps the grains separate without feeling heavy. If your noodles aren’t coated immediately, they’ll stick together as they dry.
3. The Secret to Flavor: Dressing While Warm

This seems counterintuitive since we just cooled the pasta down, but you actually want the orzo slightly warm when you add the dressing. The warm starch absorbs the bright, lemony flavors and makes the salad extra delicious. I usually let the rinsed pasta sit for just two minutes before pouring the vinaigrette over it. For the dressing base, you need a dark glass bottle of olive oil to protect against light degradation. Filippo Berio organic extra virgin olive oil works, but I prefer Wildly Virgin Joao’s Arbequina. It runs $19.99 for 375ml at Sprouts. Expert chef Gino Pinedo notes that high-quality olive oil should taste like the fruit it came from. Skip the heavy balsamic vinegars for this. They turn the pasta a muddy brown color and make the dish look dirty. Instead, use 3 tablespoons of white wine vinegar or champagne vinegar. Red wine vinegar is okay, but too much of it leaves a metallic aftertaste in cold pasta dishes. The lighter vinegars balance the fat without overpowering the delicate pasta. I whisk the olive oil and vinegar together in a separate glass measuring cup first. You have to pour the oil in a slow, steady stream while whisking vigorously to create a proper emulsion. Let’s make sure the dressing is fully emulsified before pouring it over the warm grains. If you just dump the oil and vinegar directly onto the pasta, they separate immediately. You end up with pockets of sour vinegar and mouthfuls of slick oil. You might also like: 20 Creative Easy Healthy Low Calorie Dinner Ideas Worth Trying This Year

Cathy Yoder’s Air Fryer Cookbook for Two (2026): Easy
Honestly, Cathy Yoder’s Air Fryer Cookbook for Two (2026): Easy surprised me — sturdier than it looks in the photos.
4. Adding Plant-Based Protein for a Power Bowl

A bowl of dressed pasta is a side dish. To make it a main course, you need substantial protein. I lean heavily into the protein-packed power bowl trend by adding legumes. A standard 15 oz can of chickpeas yields about 1.5 cups once you rinse and drain them. I buy the organic garbanzo beans at Kroger for $1.29 a can. The firm texture of the chickpeas contrasts perfectly with the soft orzo. If you don’t like chickpeas, 1 cup of cooked brown lentils works just as well. If you go the lentil route, buy the dry French green lentils. They hold their shape significantly better than standard brown or red lentils, which turn to mush when boiled. I simmer them in vegetable broth instead of water for an extra layer of savory flavor before chilling them. Lentils absorb the vinegar dressing beautifully and add a massive amount of fiber. I tried using grilled chicken breast in this recipe last summer, but cold chicken tends to dry out and taste chalky after two days in the fridge. The beans maintain their moisture and texture for the full four days this salad lasts. Just make sure you rinse the canned beans thoroughly in a wire mesh strainer until the water stops foaming. That starchy bean liquid makes the salad dressing cloudy and thick. You want the vinaigrette to remain clean and sharp. You might also like: 15 Clever Quick Healthy Breakfast Ideas Worth Trying This Year
5. Precision Chopping: The One-Cup Rule

The physical mechanics of eating a salad matter. If you have giant chunks of cucumber mixed with tiny grains of orzo, you can’t get a balanced bite on your fork. I spend an extra five minutes making sure every vegetable is chopped to exactly the same size as a chickpea. My standard ratio is 1 cup of halved cherry tomatoes and 1 cup of diced Persian cucumbers. I buy the 16 oz plastic clamshell of Persian cucumbers at Costco for $5.99. They have thinner skins and fewer seeds than standard English cucumbers, meaning they won’t release a puddle of water into your salad on day three. I use a freshly sharpened 8-inch chef’s knife for this. A dull knife will crush the tomatoes instead of slicing them cleanly, leaving you with a messy cutting board and mangled vegetables. Slice the cucumbers in half lengthwise, scoop out the tiny seed channel with a spoon, and dice them small. Do the same with the tomatoes. If you use standard slicing tomatoes, the wet pulp will ruin your dressing and dilute the acid. Stick to the dry, firm flesh of cherry or grape tomatoes. Take your time. Put on a podcast and treat the chopping as a methodical prep task rather than a race. This precision chopping ensures an even distribution of flavor in every single bite. If I’d known this years ago, I wouldn’t have served so many disproportionate salads. You might also like: 15 Inspiring Aesthetic Healthy Snack Ideas to Steal Right Now
6. Blanching Hard Vegetables for Better Texture

Raw broccoli in a delicate pasta salad is a textural nightmare. It feels like chewing on a tree branch. However, you still want that crunch and nutritional profile. The solution is a quick blanch. When I want to add 1 cup of broccoli florets or diced carrots, I drop them into boiling water for exactly sixty seconds. I use a slotted spoon to fish them out and immediately submerge them in a bowl of ice water. This softens the raw, fibrous bite without turning the vegetables into mush. I buy the 12 oz bag of pre-washed broccoli florets from Trader Joe’s for $2.99 to save time, but I still chop them down into tiny, chickpea-sized pieces before blanching. For carrots, I peel them first, then slice them into matchsticks before dicing them down to that crucial chickpea size. The blanching process brings out their natural sweetness, which pairs incredibly well with the sharp vinegar dressing. Just make sure your ice bath is actually filled with ice cubes, not just cold tap water. The ice locks in a vibrant, neon green color. I skipped the ice bath once because I was feeling lazy. Learned that the hard way. The residual heat kept cooking the broccoli, and it turned a sickly olive green color by the time I mixed it into the pasta. It looked terrible and tasted like cafeteria food. Don’t skip the ice water. It takes two minutes and saves the texture.

Super Easy Air Fryer Cookbook for Beginners: Quick, Simple
Honestly, Super Easy Air Fryer Cookbook for Beginners: Quick surprised me — sturdier than it looks in the photos.
7. Embracing Juicy Ingredients for Lasting Moisture

Cold pasta acts like a sponge in the refrigerator. It will soak up your dressing overnight, leaving the salad dry by lunch the next day. To combat this, you have to incorporate ingredients that release moisture and flavor as you chew. I use 1/2 cup of pitted Kalamata olives. I buy the 10 oz jar of Mezzetta Kalamata olives at Target for $4.69. I slice them in half so they distribute evenly. I also add 2 tablespoons of drained non-pareil capers. As for the capers, I buy the 3.5 oz jar of Cento non-pareil capers for $2.49. They are smaller and firmer than standard capers. These tiny pickled flower buds act like little flavor bombs. They add sharp, briny notes that cut through the starchy pasta. If you hate olives, use 1/2 cup of marinated artichoke hearts instead. If you use the artichoke hearts, pat them dry with a paper towel after draining them. They are usually packed in a cheap sunflower oil that you don’t want mixing into your high-quality olive oil dressing. Just make sure you chop them small. These juicy elements keep the salad from tasting like a dry cracker on day four. The brine also mixes with the olive oil dressing, creating a secondary sauce that coats the pasta beautifully. I used to just add more oil when the salad got dry, but that just made it greasy. The briny vegetables are the actual solution.
8. The 2026 Fermentation Trend: Miso and Kimchi

The clinical nutrition data for 2026 points heavily toward incorporating fermented foods into everyday meals. I use this pasta salad as a vehicle for gut-healthy probiotics. Instead of a standard mustard emulsifier in my dressing, I whisk in 1 tablespoon of white miso paste. I buy the 14 oz tub of Hikari Organic White Miso from Whole Foods for $6.49. It adds a deep, savory umami flavor that mimics parmesan cheese, keeping the dish completely dairy-free. Miso paste is incredibly thick. To get it to blend into the dressing, I mash it against the side of the bowl with the back of a spoon first, then slowly whisk in the vinegar until it forms a smooth slurry. Only then do I stream in the olive oil. This prevents clumps of raw miso paste from hiding in the pasta. If I want a spicier profile, I finely chop 2 tablespoons of drained cabbage kimchi and fold it directly into the cold pasta. The acidity from the fermentation replaces the need for extra vinegar. I tried adding the kimchi juice straight into the dressing once, but it turned the entire bowl an unappetizing shade of pink. Stick to the chopped fermented cabbage. It provides a tangy, probiotic boost that makes the dish taste incredibly complex with almost zero extra effort. The miso paste specifically gives the dressing a thick, creamy consistency that clings to the slippery orzo grains perfectly.
9. Fresh Herbs and Proper Chilling Times

Dried herbs taste like dust in cold salads. You need the volatile oils from fresh greens. I use a combination of 1/3 cup chopped fresh basil and 1/4 cup fresh parsley. I buy the $1.99 fresh herb packets at Walmart. Never add the basil while the pasta is still warm. It’ll turn black and slimy. Wait until the salad is completely cool. Pasta salads absorb salt and acid as they sit in the fridge. You must taste the dish right before you serve it. I almost always have to add another pinch of kosher salt and a heavy squeeze of fresh lemon juice. If your olive oil was too strong and the dressing tastes overly bitter, whisk in exactly 1/4 teaspoon of white sugar. It neutralizes the bitterness instantly without making the salad sweet. Finally, put the lid on your airtight container and refrigerate it for at least two hours. I store the finished salad in a rectangular glass Pyrex container rather than a deep plastic bowl. The shallow container allows the salad to cool evenly in the fridge, preventing the center from staying warm and breeding bacteria. Plus, glass doesn’t absorb the garlic and onion odors the way plastic containers do. Cold orzo salad always tastes better the next day after the flavors have melded. It’ll last up to four days in the fridge, making it the most reliable meal prep option I’ve found. No exaggeration.
I make a batch of this every Sunday night. It solves the Monday lunch problem when I’m too busy to cook. The chickpeas provide enough protein to keep me full until dinner, and the sharp vinegar dressing wakes up my palate. Meal prep doesn’t have to mean eating identical, boring meals every day. By mastering the base technique of this cold pasta salad, you can swap the vegetables and proteins based on whatever is on sale at the grocery store. It’s a reliable, scalable system. You won’t find a more methodical way to prep lunch. Save this guide to your Pinterest meal prep board for next week. You’ll thank yourself when you open the fridge to a perfectly hydrated, flavor-packed bowl instead of sad desk lunch takeout.

The Easy 5-Ingredient Healthy Cookbook: Simple Recipes to
Honestly, The Easy 5-Ingredient Healthy Cookbook: Simple Recipes to Make Healthy surprised me — sturdier than it looks in the photos.
Frequently Asked Questions
How long does cold orzo salad last in the fridge?
Stored in an airtight glass container, a homemade cold orzo salad will last up to four days in the refrigerator. The beans and hard vegetables maintain their texture well over this period.
Why did my cold pasta salad get hard?
You likely cooked the pasta exactly to the package directions. Cold temperatures cause starches to firm up. Always boil your pasta for one minute past al dente for cold dishes.
Should I rinse orzo for a cold salad?
Yes, you must rinse the cooked pasta under freezing cold water immediately after draining. This stops the cooking process and removes surface starch, preventing the grains from clumping together.
How do I keep my pasta salad from drying out?
Toss the warm pasta in the dressing so it absorbs the oil, and add juicy ingredients like Kalamata olives or capers. These release moisture as you chew, preventing a dry texture.
