What’s Inside
- Choose The Right Powder For Protein Balls No Bake
- Always Use Certified Gluten-Free Oats
- Master The Exact Wet-To-Dry Ratio
- Chill The Dough Before You Roll
- Use A Cookie Scoop For Perfect Portions
- Upgrade Your Nut Butter Base
- Sneak In Flaxseed And Chia For Fiber
- Pick The Right Natural Sweetener
- Add Sea Salt And Vanilla Extract
- Try Peanut Butter Powder For A Lighter Snack
- Add Collagen And Store Properly
Last Tuesday at Whole Foods, I dropped a flimsy plastic container of overpriced snacks right in the produce aisle. Blueberries and sticky oat clusters scattered everywhere. A lady with a fancy stroller glared at me. That disaster proved I needed to start making protein balls at home. Buying them pre-made is a total waste. I’ve spent years tweaking my recipes. Honestly, I failed at first. My early batches tasted like wet cardboard and fell apart if you looked at them wrong. Now, I’m sharing the exact methods I use for perfect results. Let’s fix your snack prep so you aren’t wasting ingredients or chewing on chalky lumps. Making your own treats gives you control over the sugar, the texture, and the flavor. Plus, your kitchen smells amazing when you mix vanilla and raw oats. You don’t need fancy equipment or a culinary degree. You just need the right ratios and a little patience.
1. Choose The Right Powder For Protein Balls No Bake

I used to dump cheap whey into a bowl and hope for the best. Big mistake. The texture always ended up rubbery, dry, and unappetizing. For a smooth, less crumbly result, you need to pick your base carefully. Plant-based powders are my favorite for no-bake recipes. Pea protein blends in smoothly without turning into a sticky rock. I recommend the Whole Foods Market Unflavored Pea Protein Powder. It costs exactly $19.99 for a 16 oz tub in the supplement aisle. It’s neutral in flavor, so your nut butter actually shines through. The powder is fine and smells earthy. If you insist on whey, don’t use the cheap stuff. Grab a high-quality isolate. I use Optimum Nutrition Gold Standard 100% Whey. You can usually find it for $59.99 for a 28-serving tub at Target. It blends better than a basic concentrate. Just remember whey absorbs liquid differently than pea protein. I learned that the hard way last month. I made a batch with cheap whey, didn’t adjust the liquids, and it turned into concrete in my fridge. I broke a plastic spoon trying to scoop it out. You want a powder that smells fresh when you open the tub.
2. Always Use Certified Gluten-Free Oats

Don’t grab generic store-brand oats if you have a sensitive stomach. I made that mistake years ago and spent an afternoon feeling bloated. Cross-contamination in processing facilities is a real issue. To stay safe, buy certified gluten-free rolled oats. The texture matters. Quick oats turn to mush, and steel-cut oats will crack your teeth. I’m obsessed with Bob’s Red Mill Old Fashioned Rolled Oats. I buy the 32 oz bag for $6.49 at Sprouts. The flakes are thick, dusty, and smell earthy. They hold their shape perfectly when mixed with sticky ingredients. If you’re prepping for a massive family, buy in bulk. Happy Day Brands Gluten Free Rolled Oats sells a giant 20lb bag for around $41.24 online. That’s a massive money saver. Just store them in a cool, dark pantry so they don’t go rancid. The crunch of a whole rolled oat is better than the powdery paste from instant oats. It gives the snack a rustic, homemade feel you can’t get from processed alternatives.
3. Master The Exact Wet-To-Dry Ratio

Most people get this wrong. I did for the first six months. I’d eyeball the ingredients and end up with a crumbly mess. You can’t guess with these recipes. You need a baseline. Start with this formula. Use 1.5 cups of rolled oats, 1 cup of natural nut butter, 1/4 cup of liquid sweetener, and exactly 2 scoops (about 50-60g) of your powder. Dump it into a large glass bowl. The smell of raw nut butter hitting the sweet syrup is incredible. Here’s the trick. If the mixture feels like dry sand, don’t panic and dump a cup of milk in. I ruined a batch last Thursday doing that. It turned into a sloppy soup. Instead, add cold water or unsweetened almond milk 1 teaspoon at a time. Stir vigorously with a heavy spoon. You want the dough to feel tacky but firm enough to hold a shape when squeezed. It’s a delicate balance. If you squeeze a handful and it crumbles, add one more teaspoon of liquid. You might also like: 20 Creative Easy Healthy Low Calorie Dinner Ideas Worth Trying This Year

Optimum Nutrition Gold Standard 100% Whey Protein Powder
Optimum Nutrition Gold Standard 100% Whey Protein Powder has been one of the most consistently praised picks in this category. 153 reviewers averaged 4.5/5.
4. Chill The Dough Before You Roll

This is the step everyone skips because they’re impatient. I’m guilty, too. Last summer, I tried rolling a fresh batch right after mixing. My hands were covered in sticky, warm peanut butter glue. It looked like a toddler’s art project, and half the dough went down the sink. Save yourself the frustration. Once your dough is mixed, cover the bowl tightly and put it in the fridge. Chill for at least 30 minutes. Ideally, leave it for 1 to 2 hours. The cold air firms up the fats and lets the oats absorb moisture. When you take the bowl out, the dough will be dense and cold. It won’t stick to your palms at all. You can roll perfectly smooth spheres in seconds. It’s worth the wait. Don’t rush. Let the fridge do the work. Peeling the plastic wrap off to see a firm dome of dough is satisfying. You might also like: 15 Charming School Healthy Lunch Ideas You Need to See
5. Use A Cookie Scoop For Perfect Portions

Stop using your bare hands to rip off chunks. I used to do this and ended up with massive golf balls and tiny marbles. They looked terrible in my containers. Plus, you can’t track your macros if every piece is a different size. For uniform portions, you need a tool. I swear by a 2-tablespoon cookie scoop. I bought the OXO Good Grips Medium Cookie Scoop for $16.99 at Target; it fixed my portioning issues. The metal spring makes a satisfying click and drops a measured dome of dough right into your palm. If you’re strict about nutrition, grab a digital kitchen scale. Weigh each piece to exactly 30 grams. It sounds tedious, but it speeds things up once you find a rhythm. You scoop, weigh, and roll. Having identical snacks lined up on parchment paper is great. They look like you bought them at an expensive bakery instead of making them in your messy kitchen. You might also like: 20 Beautiful Low Calorie Dinner Ideas to Transform Your Space
6. Upgrade Your Nut Butter Base

Plain peanut butter is fine, but it gets boring. I got sick of the same flavor last winter and stopped making snacks. You need to mix things up. Cashew butter is trending for good reason. It has a sweet, buttery flavor that makes snacks taste like raw cake dough. I grab the Good & Gather Creamy Cashew Butter for $8.29 per 16 oz jar at Target. It’s smooth. If you want to boost the macros, look into specialty infused spreads. Nuts ‘n More Peanut Butter is a great option. They sell a pre-made pack of three for around $3.99 at Kroger if you want to test them. Their tubs are packed with whey isolate and flax. Fit Butters is another brand I love for unique flavors. Just be careful with the natural oils. Stir the jar vigorously with a butter knife before measuring your 1 cup. If you scoop from the top, you’ll get a puddle of oil, and your dough will be a greasy disaster. I ruined a batch doing that, and the oil seeped right through my napkins.
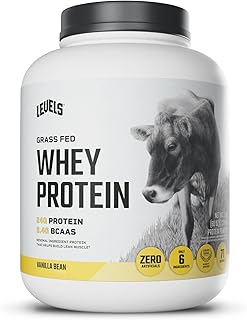
Levels Grass Fed Whey Protein Powder, No Artificials
Levels Grass Fed Whey Protein Powder has been one of the most consistently praised picks in this category. 65 reviewers averaged 4.5/5.
7. Sneak In Flaxseed And Chia For Fiber

Most homemade snacks are lacking in fiber. I realized this when I tracked my food diary and saw I was barely hitting 15 grams a day. That’s terrible for digestion. You can fix this by sneaking tiny seeds into your dough. I incorporate 1/4 cup of ground flaxseed or 1 tablespoon of chia seeds into my base. These additions act as natural binders. They soak up moisture and create a chewy texture. Plus, they increase the fiber and omega-3 content. This keeps you full for hours. I buy Spectrum Essentials Organic Ground Chia Seeds. A 10 oz bag is $8.99 at Walmart. Don’t use whole flaxseeds. Your body can’t digest them, and they’ll pass right through. Always buy them pre-ground or grind them yourself. The ground seeds add a nutty smell to the dough I love. Just check your teeth in the mirror after eating one. I went to a dentist appointment with a black chia seed stuck in my front tooth. So embarrassing.
8. Pick The Right Natural Sweetener

You don’t need refined white sugar. The natural sweetness from the nut butter and protein is almost enough. You just need a sticky liquid to hold it all together. Honey is a classic. I use exactly 1/4 cup per batch. It gives the dough a thick, floral sweetness. If you want a vegan option, maple syrup is incredible. I buy the Kirkland Signature Organic Maple Syrup. It’s $14.99 for a 33.8 oz jug at Costco. The dark amber syrup smells like a cozy winter morning. It makes the dough a bit softer than honey. If you’re cutting calories, don’t use regular syrup. Experts recommend stevia drops or a sugar-free alternative. I tried a generic sugar-free syrup once, and it was a watery mess that ruined the consistency. If you go the sugar-free route, use a thick brand like Lakanto Monkfruit Maple Flavored Syrup. I found a 13 oz bottle for $7.99 at Sprouts. The texture is close to the real thing, and it doesn’t leave a chemical aftertaste.
9. Add Sea Salt And Vanilla Extract

This is the secret bakery trick that changes everything. I used to skip the salt and vanilla because I thought they were pointless. My early batches tasted flat. They were just bland lumps of oats. A tiny pinch of salt fixes this. Add exactly 1/8 teaspoon of fine sea salt to your dry ingredients. It enhances the flavor, balances the sweetness, and brings out the roasted notes of the nut butter. Do not use coarse rock salt. I did that once, and biting into a massive salt crystal ruined the snack. Next, you need vanilla. Exactly 1 teaspoon of pure extract transforms the bowl. It gives the dough a warm, comforting smell that mimics cookie dough. I use McCormick Pure Vanilla Extract. It’s $11.48 for a 2 oz bottle at Walmart. Don’t buy the imitation stuff. It smells like cheap perfume and leaves a weird aftertaste. Real vanilla is expensive, but you’re only using a splash. It’s worth every penny when you smell that aroma.

Transparent Labs Grass-Fed Whey Protein Isolate
Transparent Labs Grass-Fed Whey Protein Isolate – Naturally Flavored punches above its price — 989 buyers rated it 4.5 stars. I would buy it again.
10. Try Peanut Butter Powder For A Lighter Snack

Sometimes you want the classic flavor without all the heavy fats. I went through a phase where I ate too much regular peanut butter and felt sluggish. That’s when I discovered the magic of powdered peanut butter. It’s a lower-fat, high-protein alternative. To make this work, you can’t just swap it dry. You need moisture. Combine exactly 1 cup (96g) of peanut butter powder with 1/2 cup of unsweetened applesauce. I use PBfit All-Natural Peanut Butter Powder. You can get a 30 oz jar for $13.98 at Sam’s Club or Walmart. For the applesauce, I grab Mott’s Unsweetened Applesauce for $3.19. Mix the powder and applesauce in a small bowl until it forms a thick paste. It smells like a Reese’s cup. The applesauce provides moisture without fat. I tried using mashed bananas once. The flavor was overpowering, and the balls turned brown and slimy after two days. Applesauce is definitely the better choice for a neutral, clean texture.
11. Add Collagen And Store Properly

If you want an extra nutritional boost, unflavored collagen is amazing. I add one scoop of Vital Proteins Collagen Peptides Powder. It costs $27.99 for a 9.33 oz tub at Target. It dissolves completely and provides an extra 25 grams of protein per serving without changing the flavor. It’s great for your skin and joints. Dietitians emphasize checking for third-party testing when buying supplements. Brands like Transparent Labs are noted for clean labels. I use their Organic Plant-Based Protein Isolate, around $2.50 per serving online. Once you’ve rolled your snacks, you must store them correctly. Leaving them on the counter is a mistake. I left a batch out in July, and they melted into a greasy puddle. Store your snacks in an airtight glass container in the refrigerator. They stay fresh for a week. For longer storage, put them in a freezer-safe bag. They freeze beautifully for up to 3 months. You can grab one straight from the freezer and eat it frozen. It tastes like a chewy ice cream bite.
Making your own snacks doesn’t have to be a stressful disaster. I’ve ruined enough batches so you don’t have to. Stick to these measurements, chill your dough, and use quality ingredients. You’ll never go back to buying those dry, overpriced snacks again. Save this guide so you have the exact wet-to-dry ratio handy for your next Sunday meal prep. Let’s get rolling!
Frequently Asked Questions
How long do protein balls no bake last in the fridge?
Store your protein balls no bake in an airtight glass container in the refrigerator for up to one week. If you need them to last longer, place them in a freezer-safe bag. They freeze beautifully for up to three months.
Why are my protein balls no bake falling apart?
Your mixture is likely too dry. You need the perfect wet-to-dry ratio. Add cold water or almond milk exactly one teaspoon at a time while stirring vigorously. Stop adding liquid once the dough feels tacky and holds its shape when squeezed.
Can I use quick oats instead of rolled oats?
I highly recommend sticking to old-fashioned rolled oats. Quick oats absorb moisture too fast and turn the dough into a mushy paste. Rolled oats provide a chewy, satisfying texture that holds up perfectly in the fridge.
What is the best protein powder for no bake snacks?
Plant-based options like pea protein work best because they blend smoothly without getting rubbery. If you prefer whey, choose a high-quality isolate. Cheap whey concentrates often dry out the dough and leave a chalky aftertaste.
