What’s Inside
- The Fairlife Vanilla Bean Foundation
- Chocolate Peanut Butter Cup High Protein Ninja Creami Recipes
- Strawberry Cheesecake Featuring Good Culture Cottage Cheese
- The Lazy Mint Chocolate Chip Pre-Made Shake Hack
- Classic Cookies and Cream With Proper Mix-In Timing
- Salted Caramel Blondie With Collagen Powder
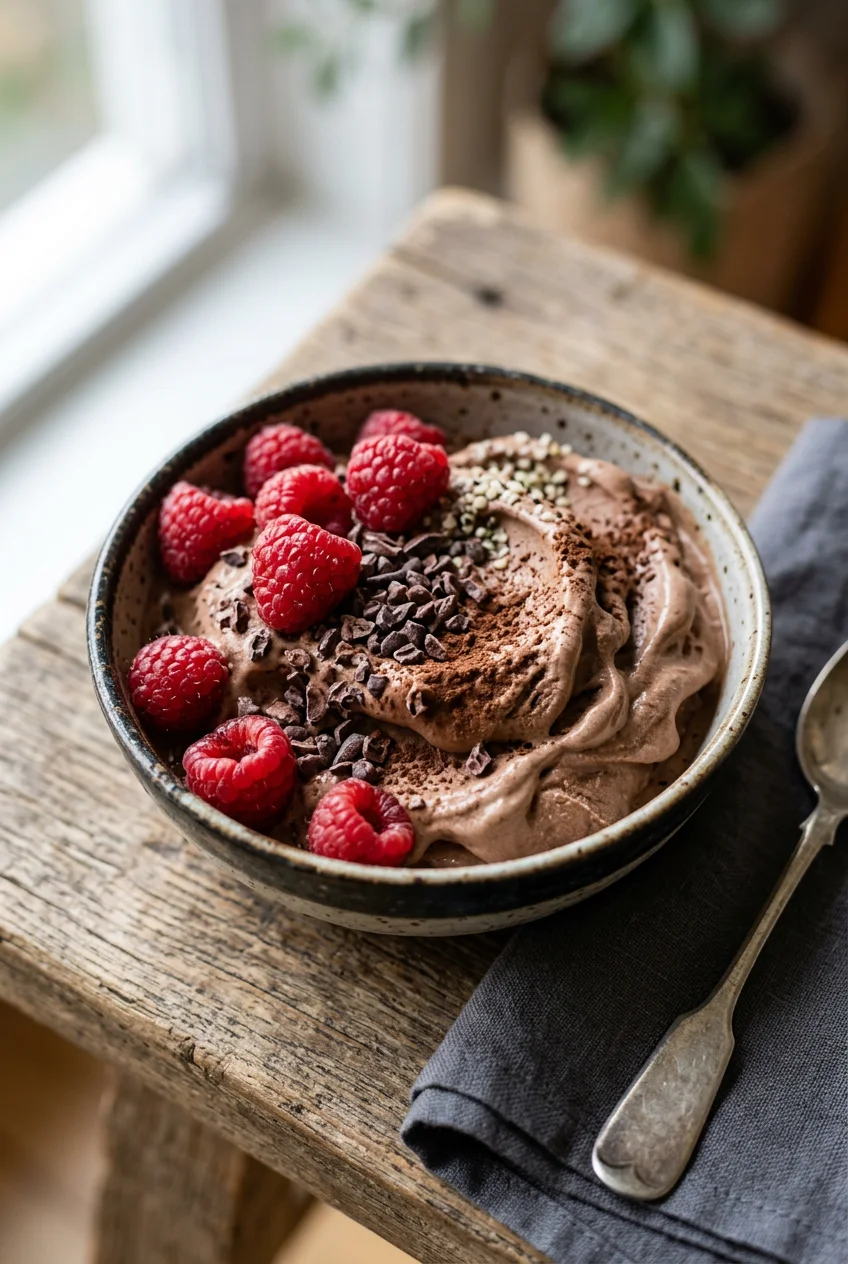
- Double Chocolate Fudge High Protein Ninja Creami Recipes
- Lemon Raspberry Swirl With Greek Yogurt
- Mocha Almond Fudge and The Re-Spin Reality
- Peanut Butter Banana and The Flat Freeze Rule
- Cake Batter Using Clean Simple Eats
Last Tuesday at Whole Foods, I stood in the frozen aisle staring at a $7.99 pint of diet ice cream that tasted like frozen chalk and sadness. I bought my machine the next day, but my first attempt at high protein ninja creami recipes resulted in a solid block of ice that nearly broke the motor. I used straight almond milk and a cheap vegan protein powder. It tasted like wet cardboard. You can’t just throw water and powder into these machines and expect magic. After six months of daily testing, scraping icy edges, and eating a lot of crumbly mistakes, I figured out the exact ratios. Making high protein ninja creami recipes requires specific fat content and stabilizers to trick the machine into whipping up a premium texture. Here are the exact formulas I use every week.
1. The Fairlife Vanilla Bean Foundation

My first three pints went straight into the trash because I tried using skim milk. Skim milk turns into a literal block of ice. I switched to Fairlife 2% milk after reading a forum thread. The extra fat makes the blade shave the ice rather than shatter it. I buy the 52 oz bottles at Target for $4.59. For a perfect vanilla base, you need exactly 12 ounces of the Fairlife 2%. Pour it into the pint container. Add one scoop (about 30 grams) of a high-quality whey isolate. I use Optimum Nutrition Vanilla Ice Cream flavor. Grab your immersion blender. I bought a cheap $15 Hamilton Beach one at Walmart specifically for this. Blend the milk and protein powder for 30 to 45 seconds right in the pint. If you just shake it, you’ll get dry pockets of powder at the bottom that the Creami blade won’t reach. Add 1/8 teaspoon of xanthan gum. I buy the Bob’s Red Mill brand for $8.29 at Sprouts. The xanthan gum acts as a stabilizer. It stops the water molecules from forming large ice crystals during the 24-hour freeze. Put the lid on and place it on a perfectly flat shelf in your freezer. If it freezes at a tilt, the blade will spin off-center and you’ll ruin your machine. I learned that the hard way in October when my machine started smoking.
2. Chocolate Peanut Butter Cup High Protein Ninja Creami Recipes

I used to dump two massive scoops of protein powder into my chocolate pints thinking more protein meant a better post-workout treat. I was wrong. Exceeding one scoop (around 40g max) of protein powder actually makes the ice cream weirdly soft and gummy. It gets stuck to the roof of your mouth. Stick to the optimal protein-to-liquid ratio: 1 scoop per 12 ounces of liquid. For this chocolate peanut butter version, I use 12 ounces of Fairlife 2% chocolate milk ($4.59 at Target). Add one scoop of Optimum Nutrition Gold Standard Extreme Milk Chocolate. I buy the 70-serving bag at Costco for $64.99, which breaks down to about $0.93 per serving. It blends perfectly without the gritty texture you get from plant-based proteins. Add 1 tablespoon of Jell-O sugar-free chocolate fudge pudding mix ($1.49 at Kroger). The modified cornstarch in the pudding mix gives it that dense, premium ice cream shop texture. Blend it for 45 seconds. After freezing for 24 hours, run it on the “Lite Ice Cream” setting. Take the pint out and use a butter knife to scrape down the icy, unmixed walls. This is a non-negotiable step. If you skip scraping the sides, you’ll have crunchy ice bits in your final bowl. Put it back in for a “Re-Spin”. Once it’s smooth, make a well in the center and drop in one chopped Reese’s Peanut Butter Cup ($1.29 at the gas station) and hit the “Mix-In” button.
3. Strawberry Cheesecake Featuring Good Culture Cottage Cheese

I know cottage cheese in ice cream sounds completely unhinged. I gagged the first time someone suggested it to me last summer. But blending 1/2 cup of Good Culture 2% cottage cheese ($1.99 for the single-serve cup at Whole Foods) into your base completely masks the cheese flavor and provides a massive textural upgrade. The casein protein in the cottage cheese gives the final product a thick, creamy body that mimics actual cream cheese. Pour 8 ounces of Fairlife 2% milk into your pint. Add the 1/2 cup of Good Culture cottage cheese. Add one scoop of strawberry whey protein isolate. Drop in 1/4 cup of fresh, diced strawberries. You have to use an immersion blender for this one. Blend it for a full 60 seconds until no cottage cheese curds remain. If you leave lumps, they freeze into rock-hard cheese pebbles, which is exactly as gross as it sounds. Freeze it flat for at least 16 hours. When you take it out of the freezer, the edges will be rock solid. Run the outside of the plastic pint under warm water from your sink for 20 to 30 seconds. This slightly thaws the very outer edge, so the blade doesn’t screech against the plastic on the first spin. Run it on “Lite Ice Cream”, scrape the sides, and re-spin. Toss in half a crushed graham cracker ($3.49 a box at Trader Joe’s) on the mix-in setting. It tastes exactly like a slice of strawberry cheesecake.

Ascent 100% Whey Protein Powder
Ascent 100% Whey Protein Powder – Post Workout Whey Protein Isolate punches above its price — 32 buyers rated it 4.5 stars. I would buy it again.
4. The Lazy Mint Chocolate Chip Pre-Made Shake Hack

Some nights I’m too tired to measure out milk and powders. That’s when I use pre-made protein shakes. I keep a case of Fairlife Nutrition Plan vanilla shakes ($21.99 for an 18-pack at Costco) in my pantry specifically for this. You just pour one 11.5-ounce shake directly into the Creami pint. But you can’t just freeze the shake by itself. I tried that in November, and it came out like a dusty snow cone. Pre-made shakes lack the necessary stabilizers for ice cream. To fix this, whisk in 1 tablespoon of Jell-O sugar-free vanilla pudding mix ($1.49 at Walmart) and 1/4 teaspoon of peppermint extract ($4.19 at Target). The pudding mix adds the body the shake is missing. Freeze for 24 hours. Run it on the “Lite Ice Cream” setting. It will look like powdery snow after the first spin. Don’t panic and don’t add liquid yet. Just hit “Re-Spin”. The friction of the second spin melts the fat just enough to bring it together. Once it’s creamy, use a spoon to dig a hole down the center of the pint. Drop in 1 tablespoon of Lily’s dark chocolate baking chips ($6.99 at Sprouts). Run the “Mix-In” cycle. The blade chops the chocolate chips into tiny, perfect shards that distribute evenly through the mint base. It’s infinitely better than the chalky diet ice creams at the grocery store.
5. Classic Cookies and Cream With Proper Mix-In Timing

Timing your mix-ins is the most common place people ruin their pints. When I first got my machine, I put crushed Oreos into the liquid base before freezing. The cookies completely dissolved into a muddy, soggy mess during the 24-hour freeze. You have to wait until the very end. For the base, use 12 ounces of Fairlife 2% milk, one scoop of vanilla whey isolate, and 1/8 teaspoon of guar gum ($7.49 at Whole Foods). Guar gum works just like xanthan gum but I find it leaves slightly less of a slick aftertaste in vanilla recipes. Blend it up and freeze it flat. Run the “Lite Ice Cream” cycle. Scrape the sides down with a butter knife. Hit “Re-Spin”. Now, take two standard Oreos ($4.99 for a pack at Target) and break them into quarters. Don’t crush them into dust. If you use Oreo dust, the machine just turns your vanilla ice cream brown. Drop the quartered cookies into the center well and press the “Mix-In” button. The specific speed of the mix-in cycle breaks the cookie chunks down just enough so you still get actual crunchy pieces in every bite. The contrast between the smooth, sweet vanilla base and the salty, bitter cocoa of the cookie is perfect. I eat this specific pint at least twice a week while watching TV. You might also like: 20 Creative Easy Healthy Low Calorie Dinner Ideas Worth Trying This Year
6. Salted Caramel Blondie With Collagen Powder

If you’re trying to avoid the artificial ingredients in commercial pudding mixes, you can use unflavored collagen powder as a stabilizer. I figured this out when I ran out of xanthan gum mid-prep last month. The gelatinous nature of collagen provides a surprisingly similar creamy texture while adding another 10 grams of protein. I use Vital Proteins Unflavored Collagen Peptides ($27.99 at Costco). For the base, combine 12 ounces of Fairlife 2% milk, one scoop of a salted caramel whey protein (Clean Simple Eats makes a great one for $59.99 online), and one scoop of the unflavored collagen. Add a heavy pinch of flaky sea salt. I use Maldon sea salt ($6.59 at Whole Foods). The salt cuts through the intense sweetness of the caramel protein powder. Use your immersion blender for 45 seconds because collagen tends to clump in cold milk if you just shake it. Freeze for 24 hours. Remember to run the warm water trick over the outside of the pint for 30 seconds before spinning. This prevents the blade from scraping hard ice off the plastic walls. Spin on “Lite Ice Cream”, scrape the sides, and re-spin. For the mix-in, I tear up half of a Quest Caramel Chocolate Chunk protein bar ($2.49 at Target) and run the mix-in cycle. The chewy chunks of the protein bar mimic actual blondie pieces perfectly. You might also like: 20 Inspiring Healthy Dessert Ideas That Make a Real Difference

Transparent Labs Grass-Fed Whey Protein Isolate
Transparent Labs Grass-Fed Whey Protein Isolate – Naturally Flavored punches above its price — 329 buyers rated it 4.5 stars. I would buy it again.
7. Double Chocolate Fudge High Protein Ninja Creami Recipes

Nailing the sweetener in chocolate high protein ninja creami recipes takes some trial and error. I used to use pure stevia drops, but the freezing process heavily magnifies the bitter, metallic aftertaste of stevia. It made my chocolate pints taste like a battery. I switched to using an erythritol and monk fruit blend. I buy the Lakanto Classic Monkfruit Sweetener ($7.49 at Sprouts). Erythritol depresses the freezing point of the liquid slightly, which actually helps keep the ice cream softer and more scoopable right out of the machine. For a rich double chocolate fudge, pour 12 ounces of Fairlife 2% chocolate milk into the pint. Add one scoop of Optimum Nutrition chocolate whey isolate. Add 1 tablespoon of unsweetened dark cocoa powder ($4.29 for Hershey’s Special Dark at Kroger). Add 1 tablespoon of the Lakanto sweetener and 1/8 teaspoon of xanthan gum. Blend for 30 seconds. The extra cocoa powder makes the base incredibly dark and rich, replacing the watery flavor you usually get with diet chocolate ice creams. Freeze flat for 24 hours. Spin on “Lite Ice Cream”. If it looks crumbly after the first spin, don’t add milk yet. Always run the “Re-Spin” cycle first. Only add 1 tablespoon of milk if it’s still powdery after the second spin. Adding liquid too early turns the whole pint into a runny milkshake. You might also like: 15 Inspiring Aesthetic Healthy Snack Ideas to Steal Right Now
8. Lemon Raspberry Swirl With Greek Yogurt

Greek yogurt adds a tartness that works perfectly for fruit-based pints. I use Fage Total 2% Greek Yogurt ($6.99 for the large tub at Target). I tried using 0% fat yogurt once, and the lack of fat made the final product icy and brittle. You need that 2% milkfat to lubricate the blade as it shaves the frozen block. In your pint, whisk together 6 ounces of Fairlife 2% milk and 6 ounces (about 3/4 cup) of the Fage 2% yogurt. Add one scoop of vanilla whey isolate and 1 tablespoon of sugar-free lemon pudding mix ($1.49 at Walmart). The lemon pudding mix provides the flavor and the necessary stabilizers. Blend with your immersion blender until completely smooth. Freeze flat for 24 hours. After you run the “Lite Ice Cream” and “Re-Spin” cycles, you’ll have a thick, creamy lemon base. Now for the raspberry swirl. I take 1/4 cup of frozen raspberries ($3.99 a bag at Trader Joe’s) and microwave them for 30 seconds until they’re soft and jammy. Dig a well in the center of your spun lemon ice cream. Pour the mashed raspberries into the hole. Do not use the “Mix-In” button for this. The mix-in cycle will completely obliterate the wet raspberries and turn the whole pint pink. Instead, just take a long spoon and manually swirl the jam through the ice cream a few times.
9. Mocha Almond Fudge and The Re-Spin Reality

Let’s talk about the reality of the first spin. The first time I used my machine, I opened the lid after the “Lite Ice Cream” cycle and almost cried. It looked like a pint of dry, powdery sand. I immediately dumped 1/4 cup of milk into it and spun it again. I ended up with soup. It’s entirely normal for the first spin on low-fat, high-protein bases to look crumbly. The machine shaves the ice on the first pass, and it needs the friction of the “Re-Spin” cycle to actually cream the fat and protein together. For this mocha flavor, I mix 10 ounces of Fairlife 2% milk with 2 ounces of cold brew coffee. I buy the Stok Unsweetened Cold Brew ($5.49 at Target). Add one scoop of chocolate whey isolate and 1 tablespoon of Jell-O sugar-free chocolate pudding mix. Blend for 45 seconds and freeze flat. Run the “Lite Ice Cream” cycle. When you open it and see powder, scrape the sides with a knife, put the lid back on, and hit “Re-Spin”. Trust the process. 90% of the time, the second spin yields a perfect texture without any extra liquid. Once it’s creamy, drop in 1 tablespoon of Blue Diamond sliced almonds ($4.99 at Kroger) and 1 tablespoon of mini chocolate chips. Run the “Mix-In” cycle. The coffee flavor perfectly cuts the sweetness of the pudding mix.

Optimum Nutrition Gold Standard 100% Whey Protein Powder
If you want something that just works, Optimum Nutrition Gold Standard 100% Whey Protein Powder is a safe bet (109 reviews, 4.5 stars).
10. Peanut Butter Banana and The Flat Freeze Rule

You must freeze your pints on a completely level surface. I shoved a pint of peanut butter banana base into a crowded freezer drawer last year. It froze at a 30-degree angle. When I put it in the machine, the blade hit the high side of the ice block unevenly, making a horrific grinding noise that knocked the machine off the counter. Always freeze upright and flat. For this recipe, mash half of a ripe banana into the bottom of the pint. Pour in 12 ounces of Fairlife 2% milk. Add one scoop of vanilla whey isolate and 2 tablespoons of PB2 powdered peanut butter ($5.99 at Walmart). Using powdered peanut butter gives you the roasted nut flavor without the massive calorie load of actual peanut butter, and the powder helps absorb excess water from the banana. Add 1/8 teaspoon of xanthan gum. Use your immersion blender to completely puree the banana into the liquid. If you leave banana chunks, they freeze into dark, icy rocks. Freeze perfectly flat for 24 hours. Run the warm water trick over the outside of the pint for 30 seconds. Spin on “Lite Ice Cream”, scrape the sides, and hit “Re-Spin”. The pectin in the banana acts as an additional natural stabilizer, making this one of the thickest, most scoopable recipes I make. I don’t even add mix-ins to this one because the texture is so good on its own.
11. Cake Batter Using Clean Simple Eats

The quality of your protein powder dictates the entire experience. I bought a cheap, chalky store-brand whey once, and no amount of pudding mix or xanthan gum could save the texture. It tasted like I was eating wet flour. For cake batter flavor, I rely exclusively on Clean Simple Eats Cake Batter protein powder ($59.99 for a bag online or at some Sprouts locations). Their formula blends incredibly smooth and doesn’t have that distinct, funky whey aftertaste. Pour 12 ounces of Fairlife 2% milk into your pint. Add one scoop of the Clean Simple Eats Cake Batter protein. Add 1 tablespoon of Jell-O sugar-free vanilla pudding mix and 1/4 teaspoon of real almond extract ($5.29 at Whole Foods). The almond extract is the secret ingredient that makes it taste like actual birthday cake rather than just sweet vanilla. Blend it thoroughly with an immersion blender for 45 seconds. Freeze flat for 24 hours. Run it on “Lite Ice Cream”, scrape the sides, and re-spin. Once the texture is perfectly smooth, make a well in the center. Add 1 tablespoon of rainbow sprinkles ($3.99 at Target). Use the “Mix-In” setting. The machine disperses the sprinkles perfectly without crushing them into a gray paste. It genuinely tastes like licking cake batter off a spatula, but it packs over 30 grams of protein.
Making healthy ice cream at home doesn’t mean eating frozen water. It’s about manipulating fat, protein, and stabilizers to trick the blade into creating a creamy emulsion. I’ve ruined enough pints to know that following the exact measurements and techniques makes the difference between a frustrating mess and a perfect dessert. Skip the skim milk, buy a decent whey isolate, and never skip scraping down the sides of the pint. Save this list for your next grocery run, and pin it to your recipe board so you don’t lose the exact ratios. Enjoy your actual ice cream.
Frequently Asked Questions
Why is my Ninja Creami protein ice cream powdery?
Powdery texture usually means you lack fat or liquid. Using skim milk or water instead of 2% milk causes icy, crumbly results. It’s also entirely normal for the first spin to look powdery. Always use the re-spin function before adding extra liquid.
Can I use plant-based protein powder in the Creami?
You can, but whey protein isolate yields a significantly smoother texture. Plant-based proteins absorb liquid differently and often result in a gritty, chalky consistency. If you use plant protein, you’ll need additional stabilizers like xanthan gum to compensate.
How much protein powder should I use per pint?
The optimal ratio is exactly one scoop (30-40g) per 10 to 14 ounces of liquid base. Adding two scoops makes the mixture overly thick, resulting in a gummy, soft-serve texture that sticks to the roof of your mouth.
Do I have to freeze the pint for a full 24 hours?
Yes. Freezing for 8 to 24 hours on a completely flat surface is mandatory. If the center isn’t fully frozen, the blade won’t shave the ice properly, resulting in a slushy texture and potentially damaging the machine’s motor.
