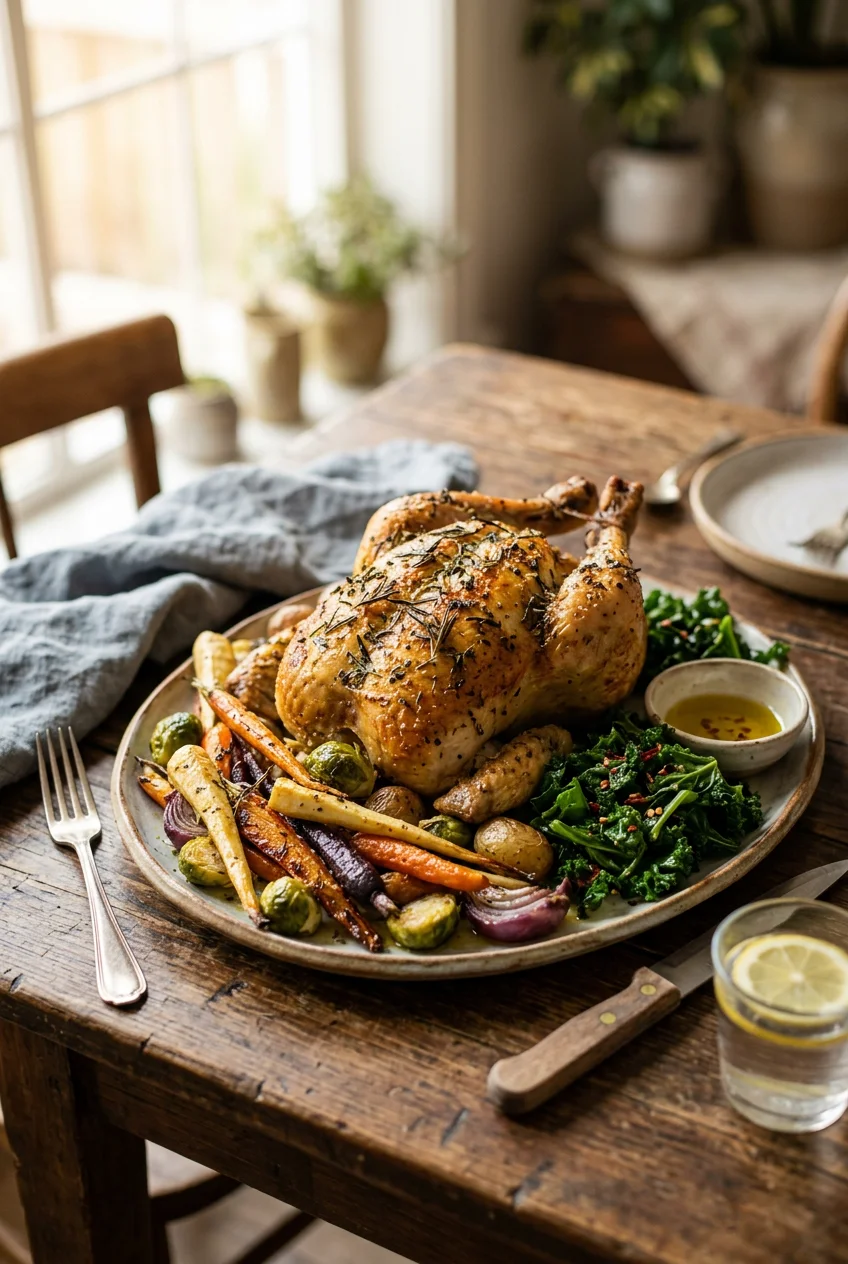
What’s Inside
- Master the Wet Brine for Basic Breasts
- Velvet Chicken for Asian-Inspired Chicken Dinner Ideas Healthy
- Air Fryer Thighs with Less Oil
- Poach for the Cleanest Chicken Dinner Ideas Healthy
- Sous Vide for Exact Temperature Control
- Sheet Pan Roasting for Zero Cleanup
- Slow Cooker Shredded Prep
- Season Smartly with Sugar-Free Blends
- Global Marinades for Flavor Fatigue
- The Instant-Read Thermometer Rule
- Proper Portioning and Lean Cuts
- The Mandatory Resting Period
I chewed through a piece of meal-prepped chicken last Tuesday that tasted exactly like dry drywall. If you need chicken dinner ideas healthy enough to fit your macros but edible enough to actually swallow, you’re in the right place. I’ve spent six years working as a clinical nutritionist, and I still mess up my own dinners sometimes. Let’s fix the dry chicken problem once and for all. I’m going to walk you through exactly how I prep my proteins now, avoiding the classic mistakes that ruin meal prep.
Chicken breast is mathematically one of the best lean proteins available, but it’s completely unforgiving. If you overcook it by three minutes, you’re eating chalk. I bought six pounds of chicken at Whole Foods last month, rushed the cooking process, and ended up feeding half of it to my dog because I couldn’t stomach the texture. You don’t have to eat bland, rubbery meat to hit your protein goals. Here are the specific techniques and measurements I use in my own kitchen.
1. Master the Wet Brine for Basic Breasts

I used to skip brining because it sounded like restaurant-level fuss. I paid for that laziness with tough, stringy chicken salads for three years. Brining is just soaking meat in saltwater, and it forces moisture into the muscle fibers before you even turn on the stove. For a standard wet brine, you need a 5 to 8 percent salt solution. I mix 1/2 cup of Morton Coarse Kosher Salt ($3.29 for a 3-pound box at Kroger) into one gallon of cold water.
You drop your chicken breasts in there for 30 minutes to four hours. Don’t leave them overnight. I forgot a batch in the fridge for two days once, and the meat turned into a weird, spongy mess that tasted like literal seawater. Took me years to figure out that 45 minutes is usually the sweet spot for standard boneless, skinless breasts. The salt breaks down the muscle proteins, which means the chicken holds onto its natural juices during cooking.
I rinse the chicken off and pat it completely dry with paper towels before cooking. If you leave the outside wet, it steams instead of searing, leaving you with pale, rubbery edges. It’s an extra step, but it completely fixes the dry chicken problem.
2. Velvet Chicken for Asian-Inspired Chicken Dinner Ideas Healthy

When clients ask me for chicken dinner ideas healthy enough for their meal plans but similar to takeout, I teach them how to velvet. Velveting is a Chinese restaurant technique that creates that incredibly soft, silky texture in stir-fries. I tried making healthy stir-fries for months by just tossing raw chicken directly into the hot cast iron pan. The meat always seized up and got incredibly tough. Velveting prevents that entirely.
You take one pound of thinly sliced chicken breast and coat it in a mixture of 1 tablespoon Argo Cornstarch ($1.99 for 16 ounces at Target), 1 teaspoon of salt, and 2 tablespoons of water. You let that sit on the counter for exactly 30 minutes. The cornstarch creates a microscopic barrier around the meat fibers.
When you drop it into a hot pan, that barrier cooks first, locking the moisture inside the chicken. It’s a very simple chemical reaction, but the texture difference is massive. I usually do a quick sear for two minutes per side before adding my vegetables. The only negative here is that cornstarch does add a few carbohydrates. If you’re tracking macros strictly on a keto protocol, you’ll need to account for those three extra grams of carbs.
3. Air Fryer Thighs with Less Oil

Air frying is basically forced convection baking, but it gets you crispy skin and rendered fat without deep-frying. I was highly skeptical of air fryers until I bought one in 2024. Now, I use it four times a week. For chicken thighs, set the machine to 400°F (200°C). You’re going to cook them for 10 to 15 minutes, flipping exactly halfway through.
The trick is getting the exterior crispy without drying out the middle. I use a very light mist of Chosen Foods 100% Pure Avocado Oil Spray. It costs about $6.98 for a 4.7-ounce can at Walmart. Avocado oil has a high smoke point, so it won’t burn and create bitter flavors in the high heat of the air fryer.
Skip the aerosol sprays that have chemical propellants in them. They ruin the non-stick coating on your air fryer basket over time. I ruined my first basket that way and had to throw it out after six months. Keep the chicken in a single layer. If you stack the thighs, the steam gets trapped, and you end up with soggy, gray meat instead of crispy edges. Always check that the internal temperature hits 165°F (74°C).

Floura Raspberry Rose Fruit-Forward Fiber Bars– High Fiber
A dependable everyday pick — Floura Raspberry Rose Fruit-Forward Fiber Bars– High Fiber pulls in 14 ratings at 4.5 stars. Not flashy, just solid.
4. Poach for the Cleanest Chicken Dinner Ideas Healthy

Poaching gets a bad reputation because people associate it with bland hospital food. When executed correctly, it’s actually the most reliable method for chicken dinner ideas healthy enough for strict anti-inflammatory diets. Nutritionists prefer poaching because it introduces zero additional cooking fats. A standard 4-ounce serving of poached chicken breast contains about 120 calories and only 1.4 grams of fat. You’re getting pure lean protein.
A common mistake people make is boiling the chicken in plain tap water. That pulls the flavor out of the meat. Instead, you need a flavorful poaching liquid. I use Swanson 33% Less Sodium Chicken Broth, which runs about $1.98 for a 32-ounce carton at Whole Foods. I drop in a few lemon slices, some whole black peppercorns, and a bay leaf. You might also like: 15 Beautiful Healthy Breakfast Ideas You Haven’t Thought Of
You bring the broth to a gentle simmer, not a rolling boil. A hard boil causes the muscle fibers to contract violently, which squeezes all the water out and leaves the meat chalky. Drop the 4-ounce chicken breasts in, turn the heat down to low, and let them gently cook until they reach 165°F. I use this method specifically for chicken that I’m going to chop up for cold salads during the summer. You might also like: 8 High Protein High Fiber Meals for Every Budget
5. Sous Vide for Exact Temperature Control

If you struggle with chronic overcooking, sous vide is the clinical fix. It involves vacuum-sealing your chicken and cooking it in a precisely controlled water bath. You literally can’t overcook it. I set my immersion circulator to 145°F (63°C) for leaner cuts. I leave the chicken in the water bath for anywhere from one to two hours. You might also like: 9 Spinach Salad Recipes That Actually Work
Because the temperature never exceeds 145°F, the chicken physically can’t dry out. I buy the Kirkland Signature Organic Boneless Skinless Chicken Breasts in bulk from Costco. They cost about $5.99 per pound, and they come in convenient pre-sealed pouches. I just cut the pouches open, add a pinch of salt, vacuum-seal them in my own bags, and drop them in the water.
The texture of sous vide chicken is completely different from roasted chicken. It’s incredibly dense but very moist. The one downside is the appearance. When you pull the chicken out of the bag, it looks completely pale and unappetizing. You have to pat it bone-dry and sear it in a screaming hot skillet for about 45 seconds per side to get any color on it. It’s an extra step, but the moisture retention is mathematically perfect.
6. Sheet Pan Roasting for Zero Cleanup


I despise washing dishes after a long clinic day. Sheet pan meals solve the cleanup problem while keeping the macronutrient profile balanced. You need a large, heavy-duty rimmed baking sheet. I toss 1.5 pounds of boneless, skinless chicken thighs with two to three cups of chopped vegetables. Broccoli florets, diced bell peppers, and cubed sweet potatoes work best because they roast at roughly the same speed as the chicken.
You need a fat to carry the heat and the seasoning. I use exactly two tablespoons of Trader Joe’s Extra Virgin Olive Oil, which is $7.99 for a one-liter bottle. Olive oil is perfect for medium-heat roasting. I set the oven to 400°F (200°C) and roast everything for 20 to 30 minutes. The vegetables get tender-crisp, and the chicken cooks through evenly.
The biggest mistake I see clients make here is overcrowding the pan. If the chicken is touching the vegetables, the moisture gets trapped. The entire pan ends up steaming instead of roasting. You won’t get any caramelization. I did this last Thanksgiving with a massive batch of meal prep, and I had to eat soggy, gray broccoli for four days. Give everything at least half an inch of space.

Gordon Ramsay’s Healthy
A dependable everyday pick — Gordon Ramsay’s Healthy. Not flashy, just solid.
7. Slow Cooker Shredded Prep

Having a container of plain, shredded chicken in the fridge is the ultimate defense against ordering takeout on a Wednesday night. I prep a large batch every Sunday afternoon. I put three pounds of boneless, skinless breasts or thighs into my slow cooker. You need a liquid to create steam, but you don’t need much.
I pour in exactly one cup of Kitchen Basics No Salt Added Chicken Broth. It’s usually $3.49 for a 32-ounce carton at Sprouts. I set the machine to high for three to four hours, or low for six to eight hours. Once it’s done, the meat should fall apart when you press it with a fork. I pull the chicken out, put it in a large glass bowl, and use a hand mixer to shred it in about thirty seconds. It’s a loud, messy trick, but it saves ten minutes of pulling meat apart with two forks.
The negative here is that slow-cooked chicken can taste very monotonous if you eat it plain. I keep it unseasoned in the fridge, and then I add different sauces or spices to individual portions right before I eat them. It keeps the meal prep from feeling repetitive.
8. Season Smartly with Sugar-Free Blends

Most commercial seasoning blends are packed with maltodextrin, cane sugar, and cheap sodium. You think you’re making a healthy choice by avoiding heavy sauces, but you’re accidentally rubbing a tablespoon of sugar onto your dinner. I learned that the hard way when I couldn’t figure out why my blood sugar was spiking after eating seemingly clean grilled chicken.
You have to read the ingredient labels on your dry rubs. I currently use RawSpiceBar’s Salt & Sugar Free Chicken Seasoning. It costs about $9.00 for a 2-ounce pouch, and I order it online or look for similar clean brands like Mingle Seasoning at Walmart. These blends rely on heavy aromatics (smoked paprika, dried garlic, onion powder, and crushed herbs) instead of sugar to create a crust on the meat.
When you cook without sugar in your rub, the chicken won’t caramelize and blacken as quickly in the pan. You have to rely on proper heat management to get a good sear. If you don’t want to buy a specialty blend, just mix one tablespoon of smoked paprika, one teaspoon of garlic powder, and half a teaspoon of dried oregano in a small jar. It costs pennies and contains zero fillers.
9. Global Marinades for Flavor Fatigue

Chicken breast is a blank canvas, which is a polite way of saying it tastes like nothing on its own. If you eat the same lemon-pepper profile every day, you’re going to experience flavor fatigue and fall off your nutrition plan. I fix this by rotating through different global marinade profiles weekly.
My standard Asian-inspired marinade uses 2 tablespoons of Kikkoman Less Sodium Soy Sauce ($3.59 for a 10-ounce bottle at Target), 1 tablespoon of unseasoned rice vinegar, 1 teaspoon of freshly grated ginger, and 1 teaspoon of toasted sesame oil. You need an acid, a salty element, and an aromatic to actually penetrate the meat. I marinate the chicken for at least 30 minutes, but never more than four hours.
If you leave chicken in an acidic marinade overnight, the vinegar chemically cooks the exterior of the meat. I did this with a lime juice marinade last summer, and the chicken turned into a chalky, stringy disaster before it even hit the grill. Keep the marinating time short and focused. The sesame oil in this specific blend adds a deep, roasted flavor that completely masks the fact that you’re eating plain chicken breast again.

The Well Plated Cookbook: Fast
If you want something that just works, The Well Plated Cookbook: Fast is a safe bet.
10. The Instant-Read Thermometer Rule


If you’re still cutting your chicken open to see if the juices run clear, you’re guessing. Guessing leads to dry, overcooked meat or dangerous, undercooked centers. Visual cues are useless because the color of the meat can change based on the pH of the marinade or the freezing method used by the supplier. You need an instant-read thermometer. It’s the only scientifically accurate way to guarantee doneness.
I use a basic ThermoPro Digital Thermometer. It costs exactly $10.99 at Target. You insert the probe into the absolute thickest part of the breast, horizontally. You’re looking for an internal temperature of exactly 165°F (74°C). The second the digital display hits 165°F, you pull the meat off the heat source. The temperature will actually continue to rise a few degrees while it sits on the plate due to carryover cooking.
I spent my entire twenties eating rubbery chicken because I was terrified of salmonella and left the meat in the pan for an extra five minutes just to be safe. Those five minutes destroy the cellular structure of the protein. Buy the thermometer. It pays for itself the very first time you don’t ruin a six-dollar piece of meat.
11. Proper Portioning and Lean Cuts


A healthy dinner isn’t just about how you cook the food; it’s about how much of it you put on your plate. A standard, nutritionally appropriate portion size for cooked chicken is four ounces. Visually, that’s roughly the size and thickness of a standard deck of playing cards. When I first started tracking my macros, I realized I was routinely eating eight to ten ounces of chicken in a single sitting. Even with lean protein, excess calories still count.
I focus primarily on boneless, skinless chicken breasts or thighs because they offer the best protein-to-fat ratio. If you’re watching your grocery budget, you don’t have to buy organic. Organic chicken breast can run upwards of $6.00 per pound. I frequently buy conventional Aldi Kirkwood Boneless Skinless Chicken Breasts. When they go on sale, I can get them for as low as $2.49 per pound.
I buy ten pounds at a time and freeze them in four-ounce portions. The nutritional difference between conventional and organic chicken is statistically negligible regarding protein content. The key is trimming any visible yellow fat off the thighs before you cook them. That simple prep step saves you about forty calories of saturated fat per serving.
12. The Mandatory Resting Period


This is the step almost everyone skips, and it ruins perfectly cooked meat. After you pull your chicken off the stove or out of the oven, you have to let it rest. I enforce a mandatory five to ten-minute resting period for all poultry. When chicken is exposed to high heat, the muscle fibers contract and push all the internal moisture toward the center of the meat.
If you take a knife and slice into that breast immediately, all that trapped liquid will pour out onto your plate. You’re left with dry meat and a soggy side dish. By letting the chicken sit untouched for ten minutes, the muscle fibers relax, and the juices redistribute evenly throughout the entire piece of meat. I move my cooked chicken directly onto an Epicurean Composite Cutting Board ($24.99 on Amazon) and just walk away.
I don’t tent it with foil, because foil traps the steam and ruins any crispy crust you managed to build in the pan. Just leave it exposed at room temperature. The meat won’t get cold in ten minutes. Trust me on this. I used to chop my chicken directly out of the pan for salads, and I always wondered why it felt like chewing on cotton. Resting fixes it completely.
I hope these specific techniques help you stop cooking dry, boring proteins. If you found these tips helpful, pin this article to your meal prep board so you have the temperature and marinade ratios saved for your next grocery run.

Downshiftology Healthy Meal Prep: 100+ Make-Ahead Recipes
If you want something that just works, Downshiftology Healthy Meal Prep: 100+ Make-Ahead Recipes and Quick-As is a safe bet.
Frequently Asked Questions
What is the healthiest way to cook chicken?
Poaching is considered the healthiest method because it requires zero added fats or oils. Cooking a 4-ounce chicken breast in low-sodium broth at a gentle simmer yields a lean, moist protein source with only about 120 calories and 1.4 grams of fat.
How do you keep chicken breast from drying out?
You must use an instant-read thermometer and pull the chicken off the heat exactly at 165°F (74°C). Additionally, using a wet brine (saltwater soak) for 45 minutes before cooking and letting the meat rest for 10 minutes after cooking prevents moisture loss.
Are chicken thighs healthy for dinner?
Yes, boneless, skinless chicken thighs are a healthy option. While they contain slightly more fat than breasts, they are rich in iron and zinc. Trimming visible fat before cooking and using a low-oil method like air frying keeps the macros balanced.
What are some healthy, sugar-free seasonings for chicken?
Avoid commercial rubs containing maltodextrin or cane sugar. Instead, rely on heavy aromatics like smoked paprika, garlic powder, onion powder, and dried oregano. Brands like RawSpiceBar and Mingle offer excellent clean, sugar-free blends that won’t spike your blood sugar.
